Installing a Dome Camera on a Wall - Installation Guide
When mounting any dome camera be mindful that moisture can get trapped in between the lens and cover on rainy or humid days. Try to install any dome camera on the dryest day possible. Moisture trapped in between the lens and dome camera will cause poor night vision performance.
Step 1:
Step 2:
Drill the mounting points as well as a hole to run the cable through the wall if needed. Make sure to use the appropriate drill bit for the surface you are mounting to.
Step 3:
Step 4:
You can now run the cable to the electrical mount box, install the install the weatherproof connector and terminate the end.
Step 5:
Step 6:
Mount the camera to the electrical mounting box and position the camera. Here's a great video on positioning our dome cameras.
Step 7:
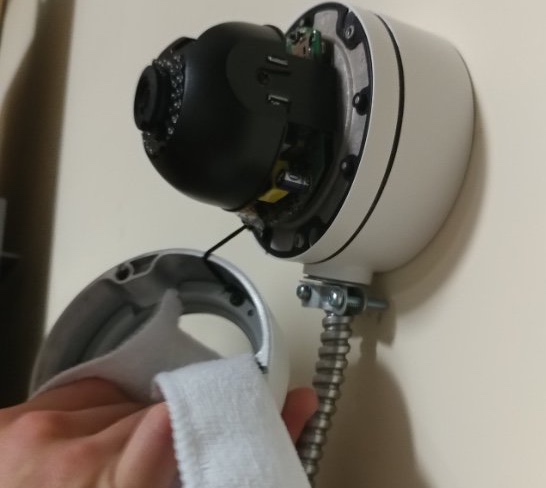
Before reinstalling the dome cover be sure to remove any residue (dirt, fingerprints, dust, grease, etc) from the lens using a lint free cloth.
Reminder: if you dome has residue on it, you will face at least one of these issues with your video.
Finished Installation:
This guide is applicable for these models: Deputy 2.0 - 26DF2, Deputy 4.0 - 26DF4, Deputy 8.0 - 26DF8, Sheriff 4.0 - 26DF4-IK10, Detective 4.0 - 26DV4, Informant 4.0 - 26DF4-A, Judge 8.0 - 26DV8, Radius 12.0 - 26P8, Guardian Pro 2.0 - 41220, Guardian Pro 3.0 - 41230, Guardian Pro 4.0 - 41240,Marshall Pro 2.0 - 41420, Marshall Pro 4.0 - 41440, Mosquito Pro 3.0 - 41330, Mosquito Pro 4.0 - 41340, Scout Pro 4MP - 41460, Captain IntelliPro 3.0 - 42430, Thunderbolt 4K IntelliPro - ID08V2812MI, Raptor 12MP IntelliPro - ID12V2812MI, The Observer Pro 6.0 - 48060, Patriot 511 and Recon 521.


