Desktop VMS - Viewstation
View multiple NVRs or even multiple locations simultaneously with up to 64 cameras live at a time with our free VMS platform for Admiral, Imperial and Corporal line recorders. A powerful software for Windows or Mac, SCW Viewstation is full of features like multi-site capability, robust live view, saved views, powerful playback, smart search and so much more.
Key features of SCW Viewstation
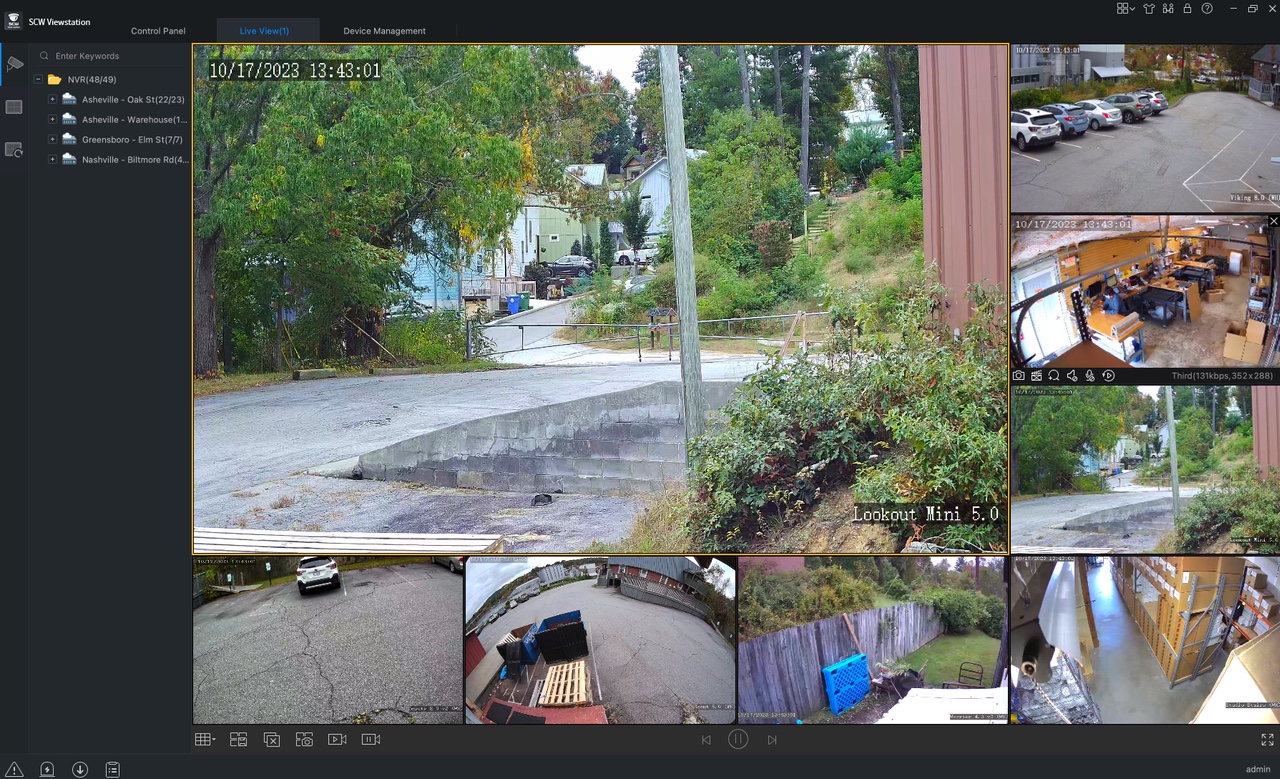
Multi Location
With SCW Viewstation, you can view all your locations easily on one centralized platform. Through the app, you can view all of your NVRs with up to 16 camera live view and saved view capability.
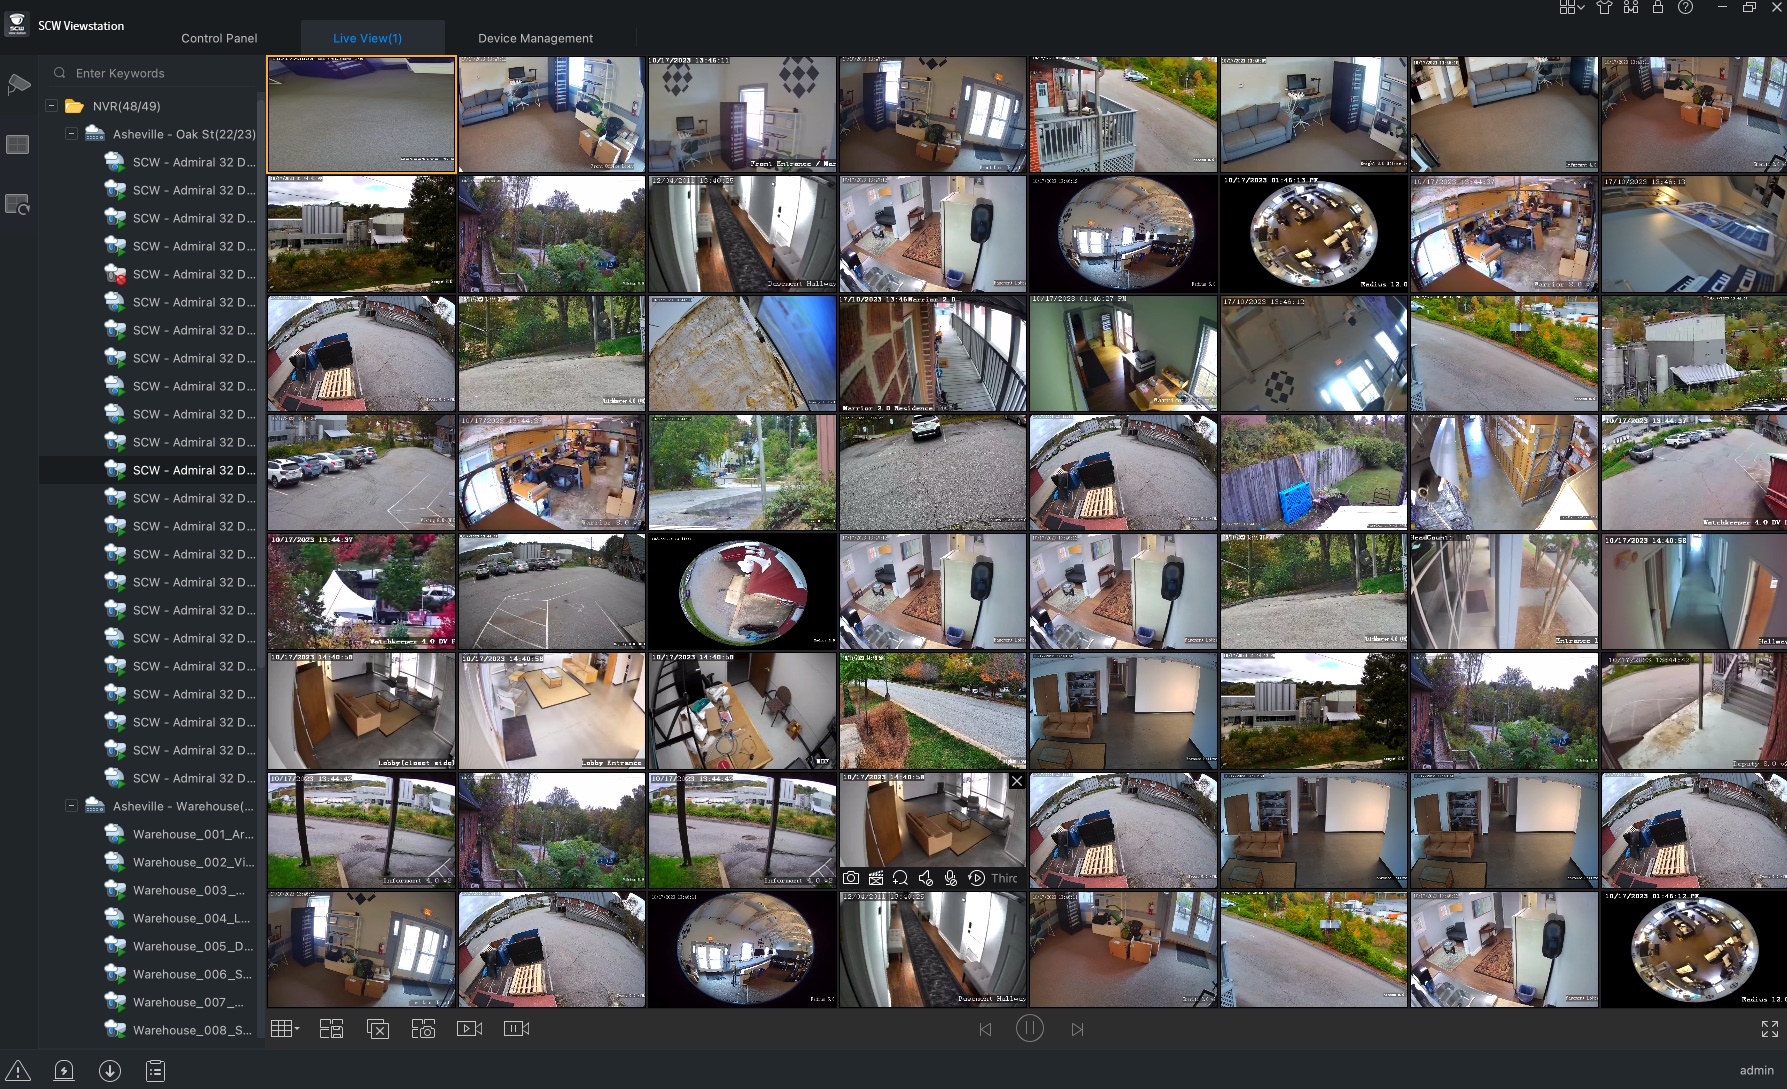
Robust Live View
With SCW Viewstation’s Robust Live View feature, you can view up to 64 simultaneous live streams and custom saved views and multi-screen compatibility.
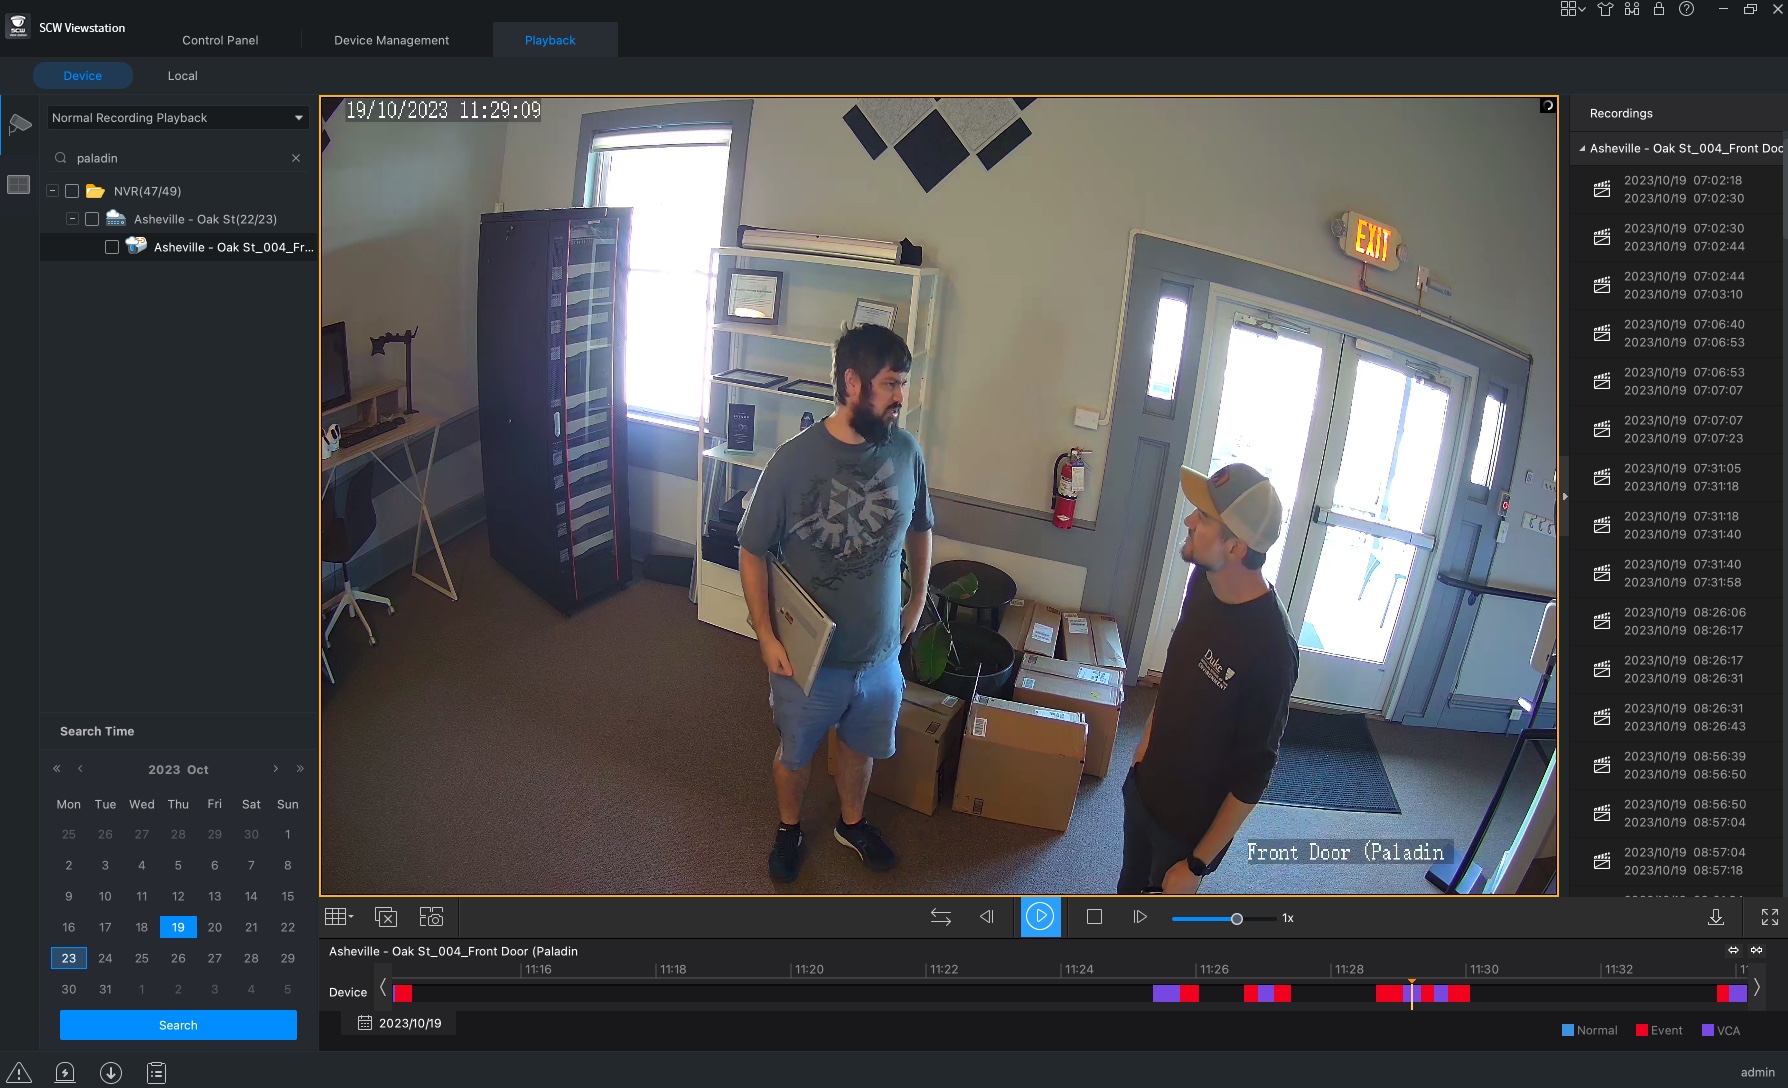
Powerful Playback
Access powerful multi-camera playback with smart search so you can easily retrieve the footage you need.
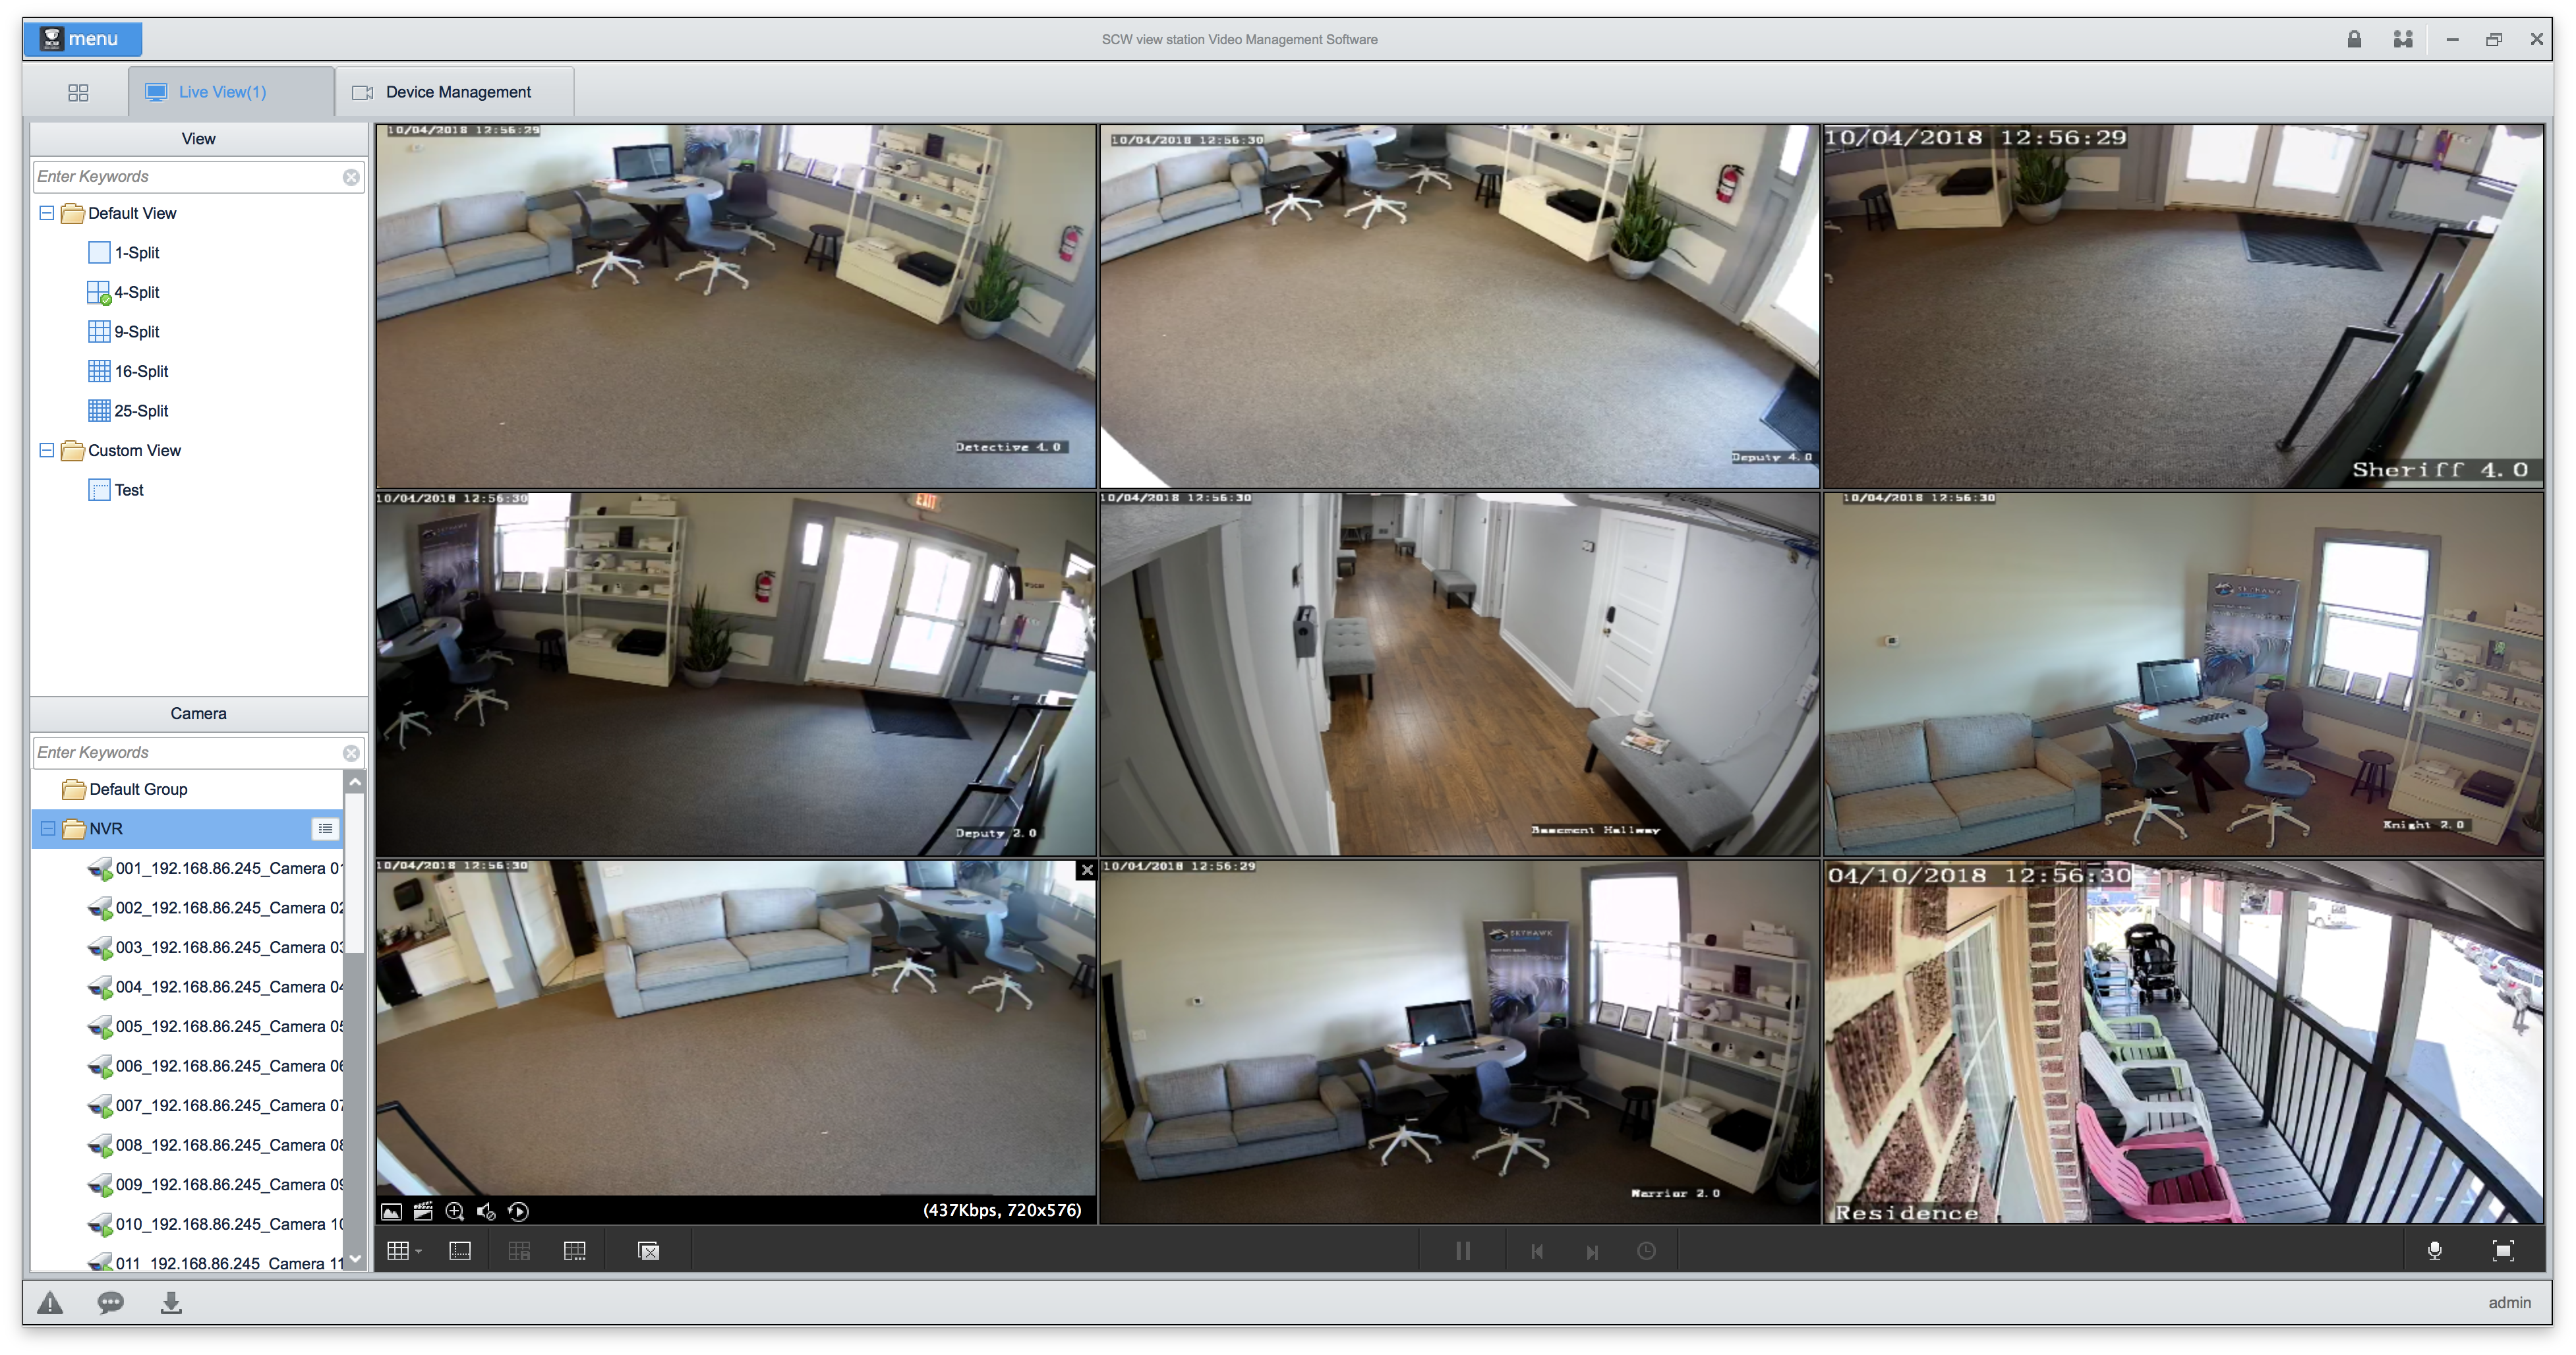
Scalable and Free
This scalable and free software lets you use up to 64 different devices or up to 512 different channels. It’s completely free with our NVRs and comes with no licensing fees.
Single and Multi-camera Live View Options
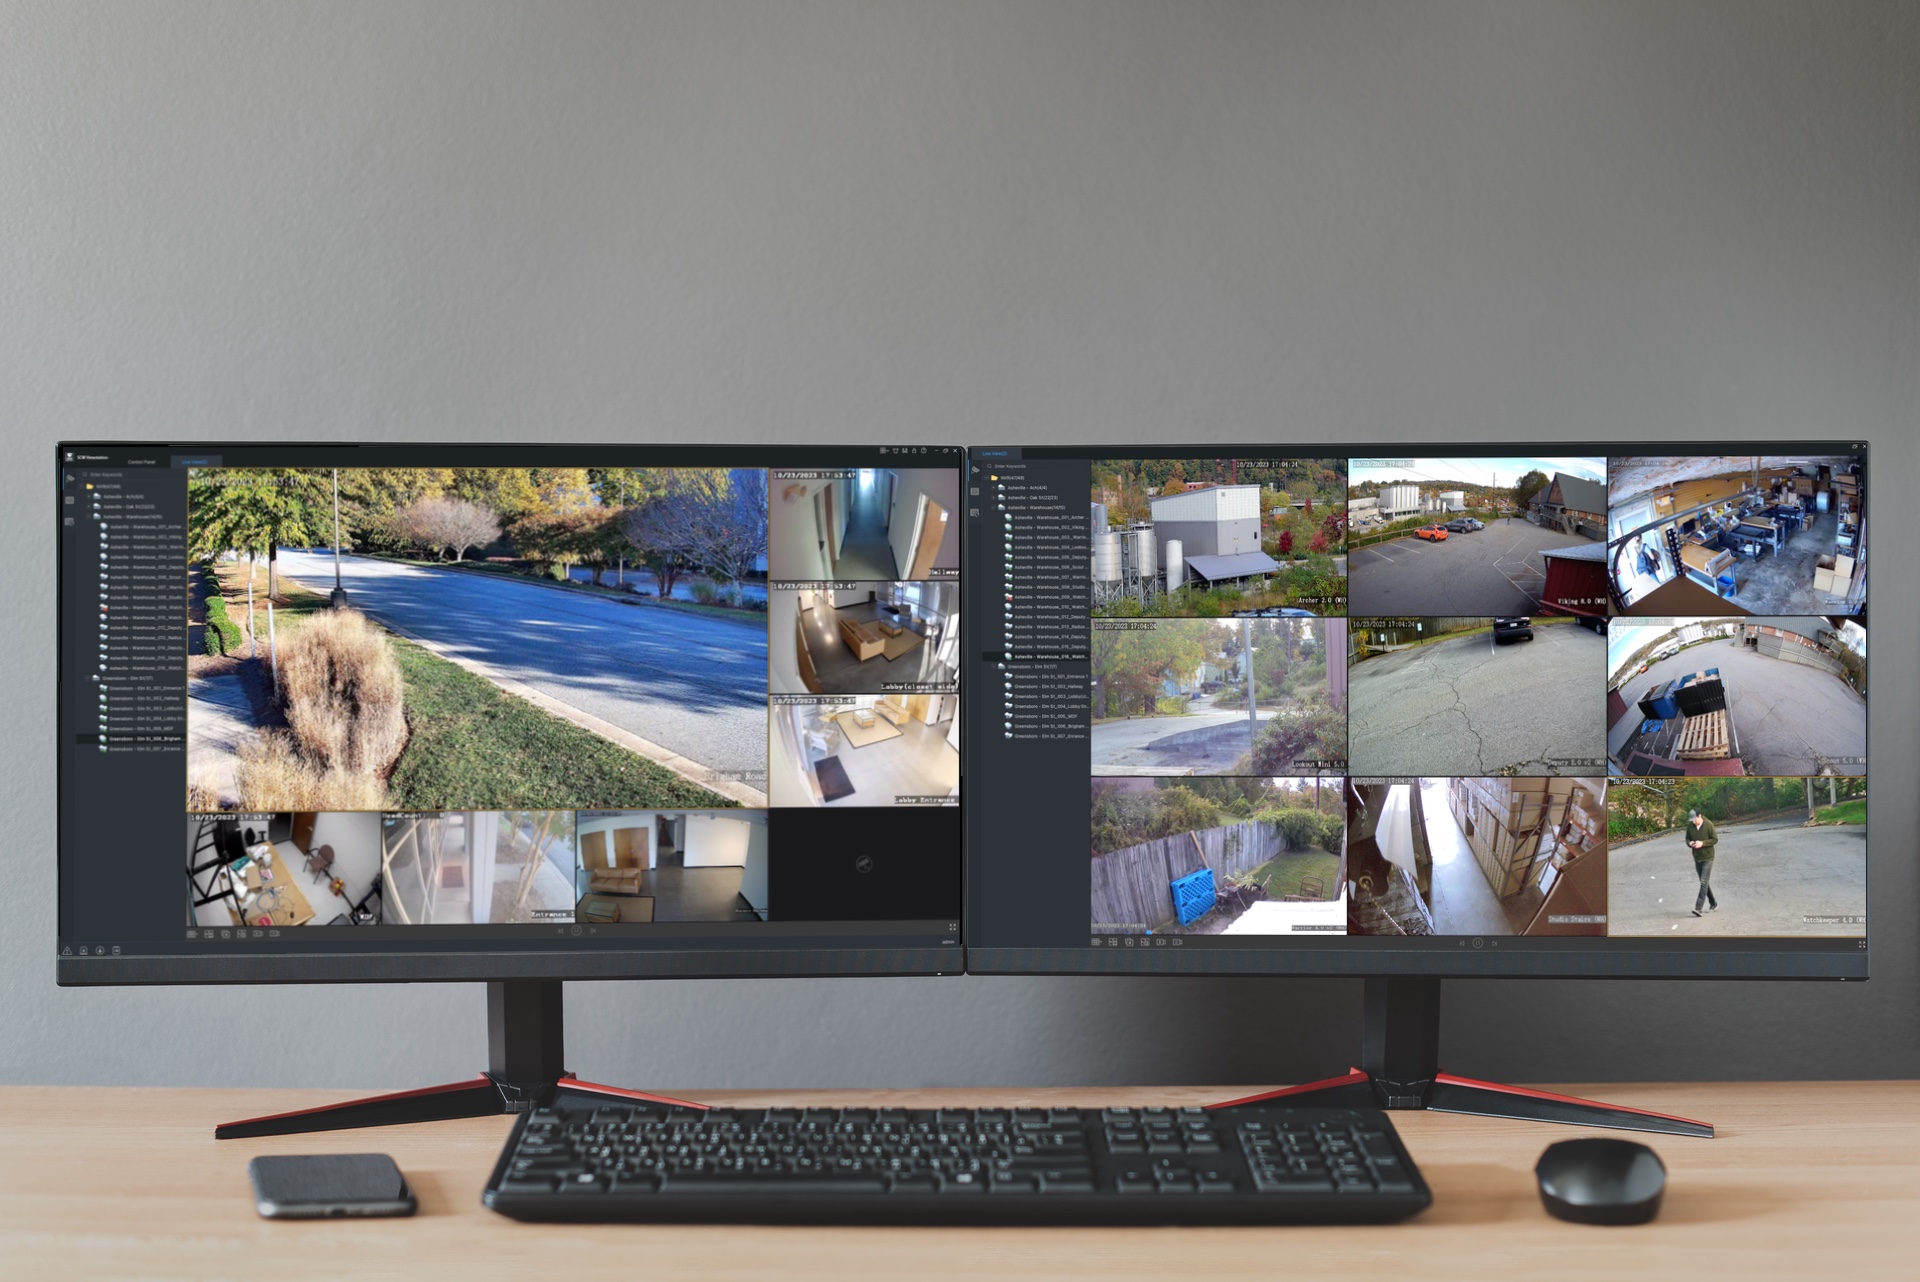
SCW Viewstation’s Robust Live View allows you to view up to 64 simultaneous live streams, as well as custom-saved views.
To get started, click on ‘Live View’ and you’ll see your list of NVRs on the left, and below that, you’ll see the grid options. This is where you can select which cameras to see and what the layout will be.
Layouts are available for a single camera, all the way up to 64 at a time. A number of options in between are available for different sizes and layouts, and you can even create your own custom grid layout.
To bring up an individual NVR, simply double-click it in the menu on the left. Or, you can bring up all of your NVRs by double-clicking on the folder icon. That will show all of the cameras available to you in the grid. If you want to rearrange your grid, you can simply drag and drop cameras wherever you wish.
Saved Views - The possibilities are endless.
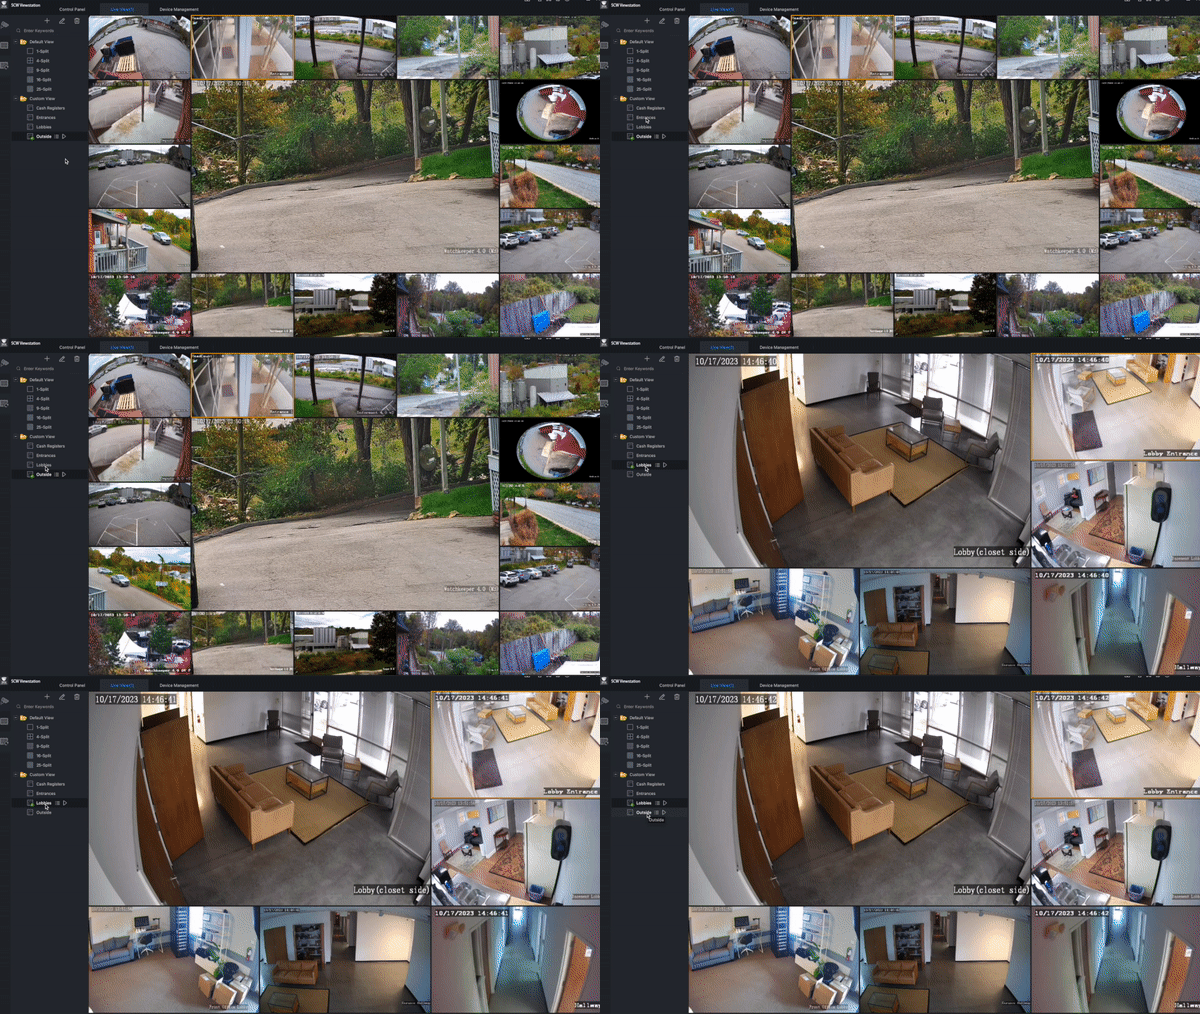
SCW Viewstation’s Saved Views feature allows you to create a custom grid with cameras that you care about, allowing you to easily bring up the vision with just a couple of taps.
To create a custom view for say, your lobbies, start by searching by camera name in the search bar at the top and select the cameras that you want. Then simply grab the camera and drag it over to the grid view.
You can drag and drop cameras from different NVRs and locations allowing you to mix and match your view with different locations if you want. By clicking on the camera, you can also choose which stream type you want so you can decide on the quality available in the view.
Once you’ve ordered the grid, click the ‘save view’ button at the bottom to save the view and name it. Now that it’s saved, you can easily access this view anytime you like simply by clicking on the ‘view’ tab on the left. This will show you your list of custom views. Simply click the custom view you wish to access.
SCW Viewstation’s Saved Views is a very powerful feature that allows you to manage large systems more easily. Imagine you owned 50 fast food locations, each with its own cameras. You could easily create a saved view for all 50 of your cash registers and bring up those cameras with just a couple of clicks. Or, imagine you’re a multi-storey hotel. You could create a saved view for each of your floors.
Easily review your recorded footage.

In SCW Viewstation, Playback looks pretty similar to Live View.
To start Playback, simply select the camera you want to playback from the menu on the left and then select the date and hit ‘search’.
The footage from that camera on your selected date will now appear with a footage timeline visible at the bottom. You may notice there are both blue and red indicators in the timeline. If a camera is set to record 24/7 that will appear as the blue while if it’s set to detect motion, those movements will appear as red.
To reduce the length of the timeline, click the button in the bottom right to make it in smaller and smaller increments. This can be really helpful to navigate to a specific time period.
To view a specific time, simply click on the timeline and it will jump to that exact time.
You can also choose to fast forward the footage up to 16x speed using the bar above the timeline.
Another way to navigate to motion clips is by using the bar on the right of the footage. The bar will show multiple clip times which can be viewed simply by double-clicking on the one you want to view.
Easily locate the clip that you need
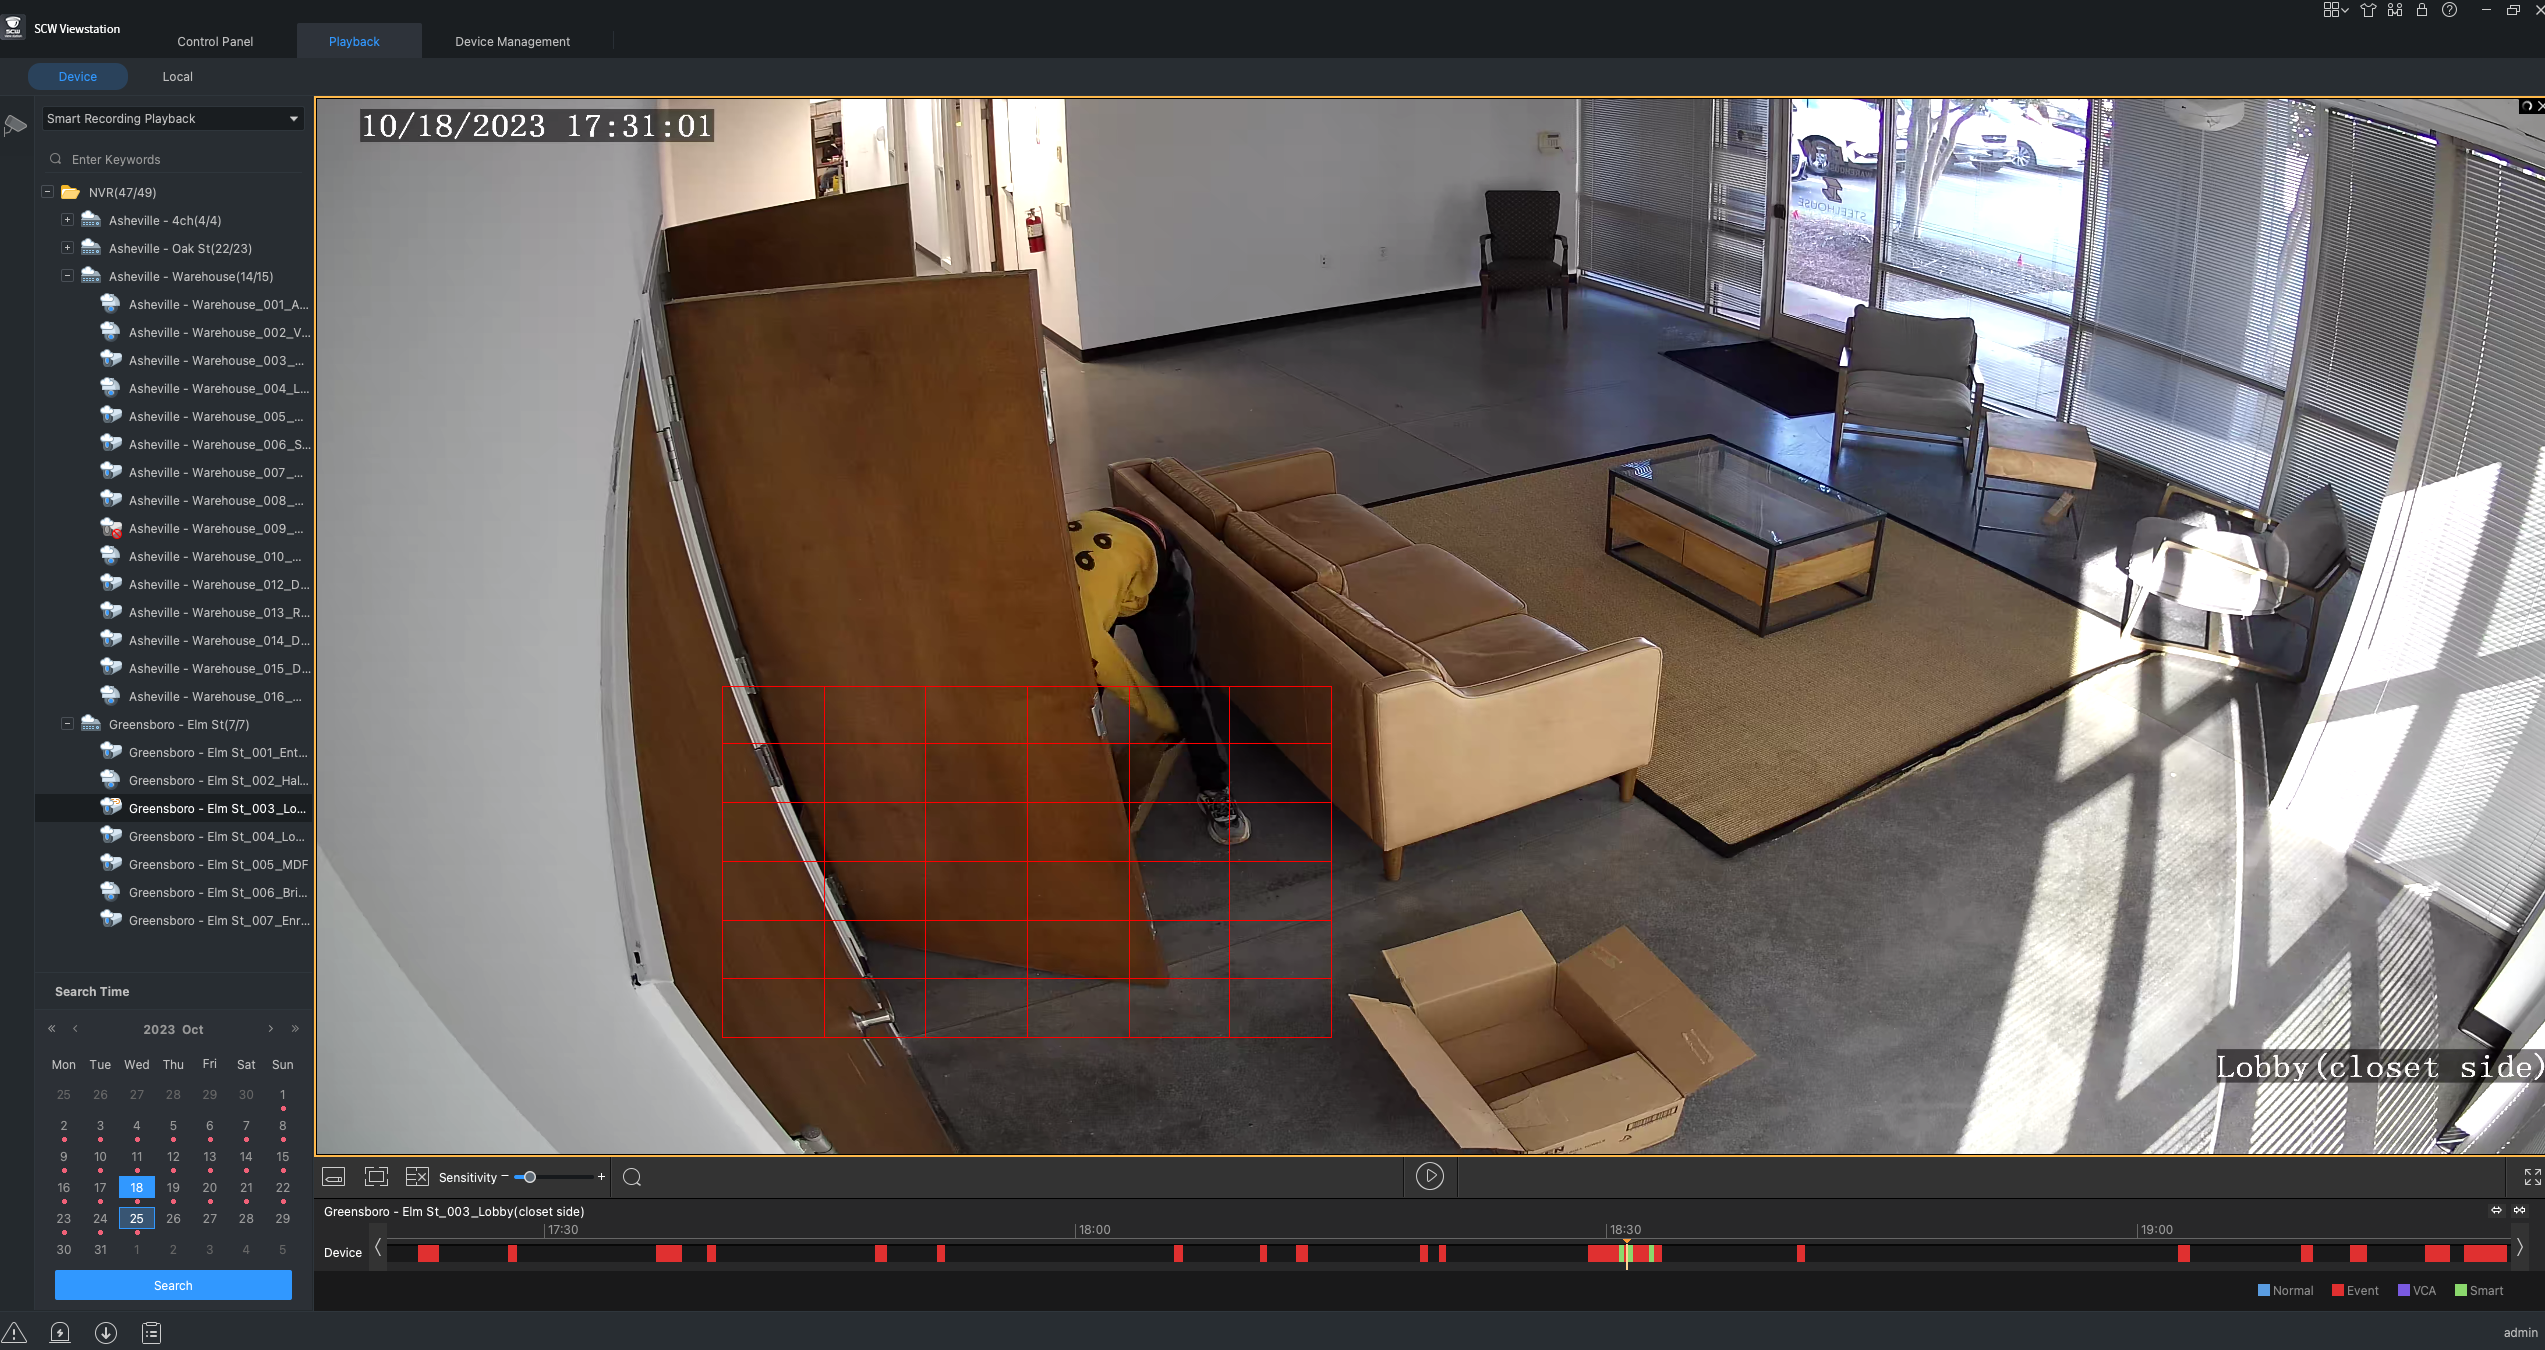
With SCW Viewstation’s Smart Search feature, you can choose individual areas to do a motion search on.
For example, you may want to find out who left their bag on a table. To do this, simply draw a grid around the bag using your mouse and click the ‘search’ icon at the bottom left of the footage. A timeline will appear with 2 different colors on it - both red and green. Red indicates regular motion detection while green indicates motion that was detected in the grid you drew, immediately narrowing down the amount of footage you have to go through. Instead of having to go through all of the red clips, you now only have to go through the handful of green clips.
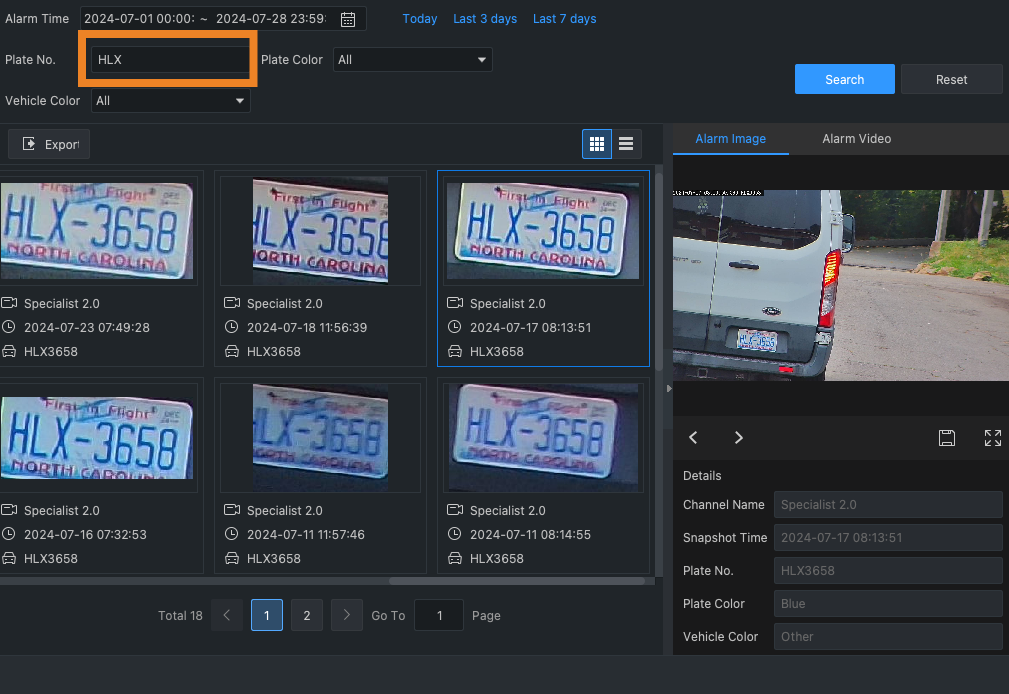
License Plate Search
If you have one of our LPR enabled cameras, such as the Specialist, paired with one of our supported NVRs, you can detect license plates, take snapshots of the plate, and transcribe the plates using optical character recognition. This allows you to easily see plates, search for plate numbers, create lists, and more! See this video for more details on License Plate Operations.
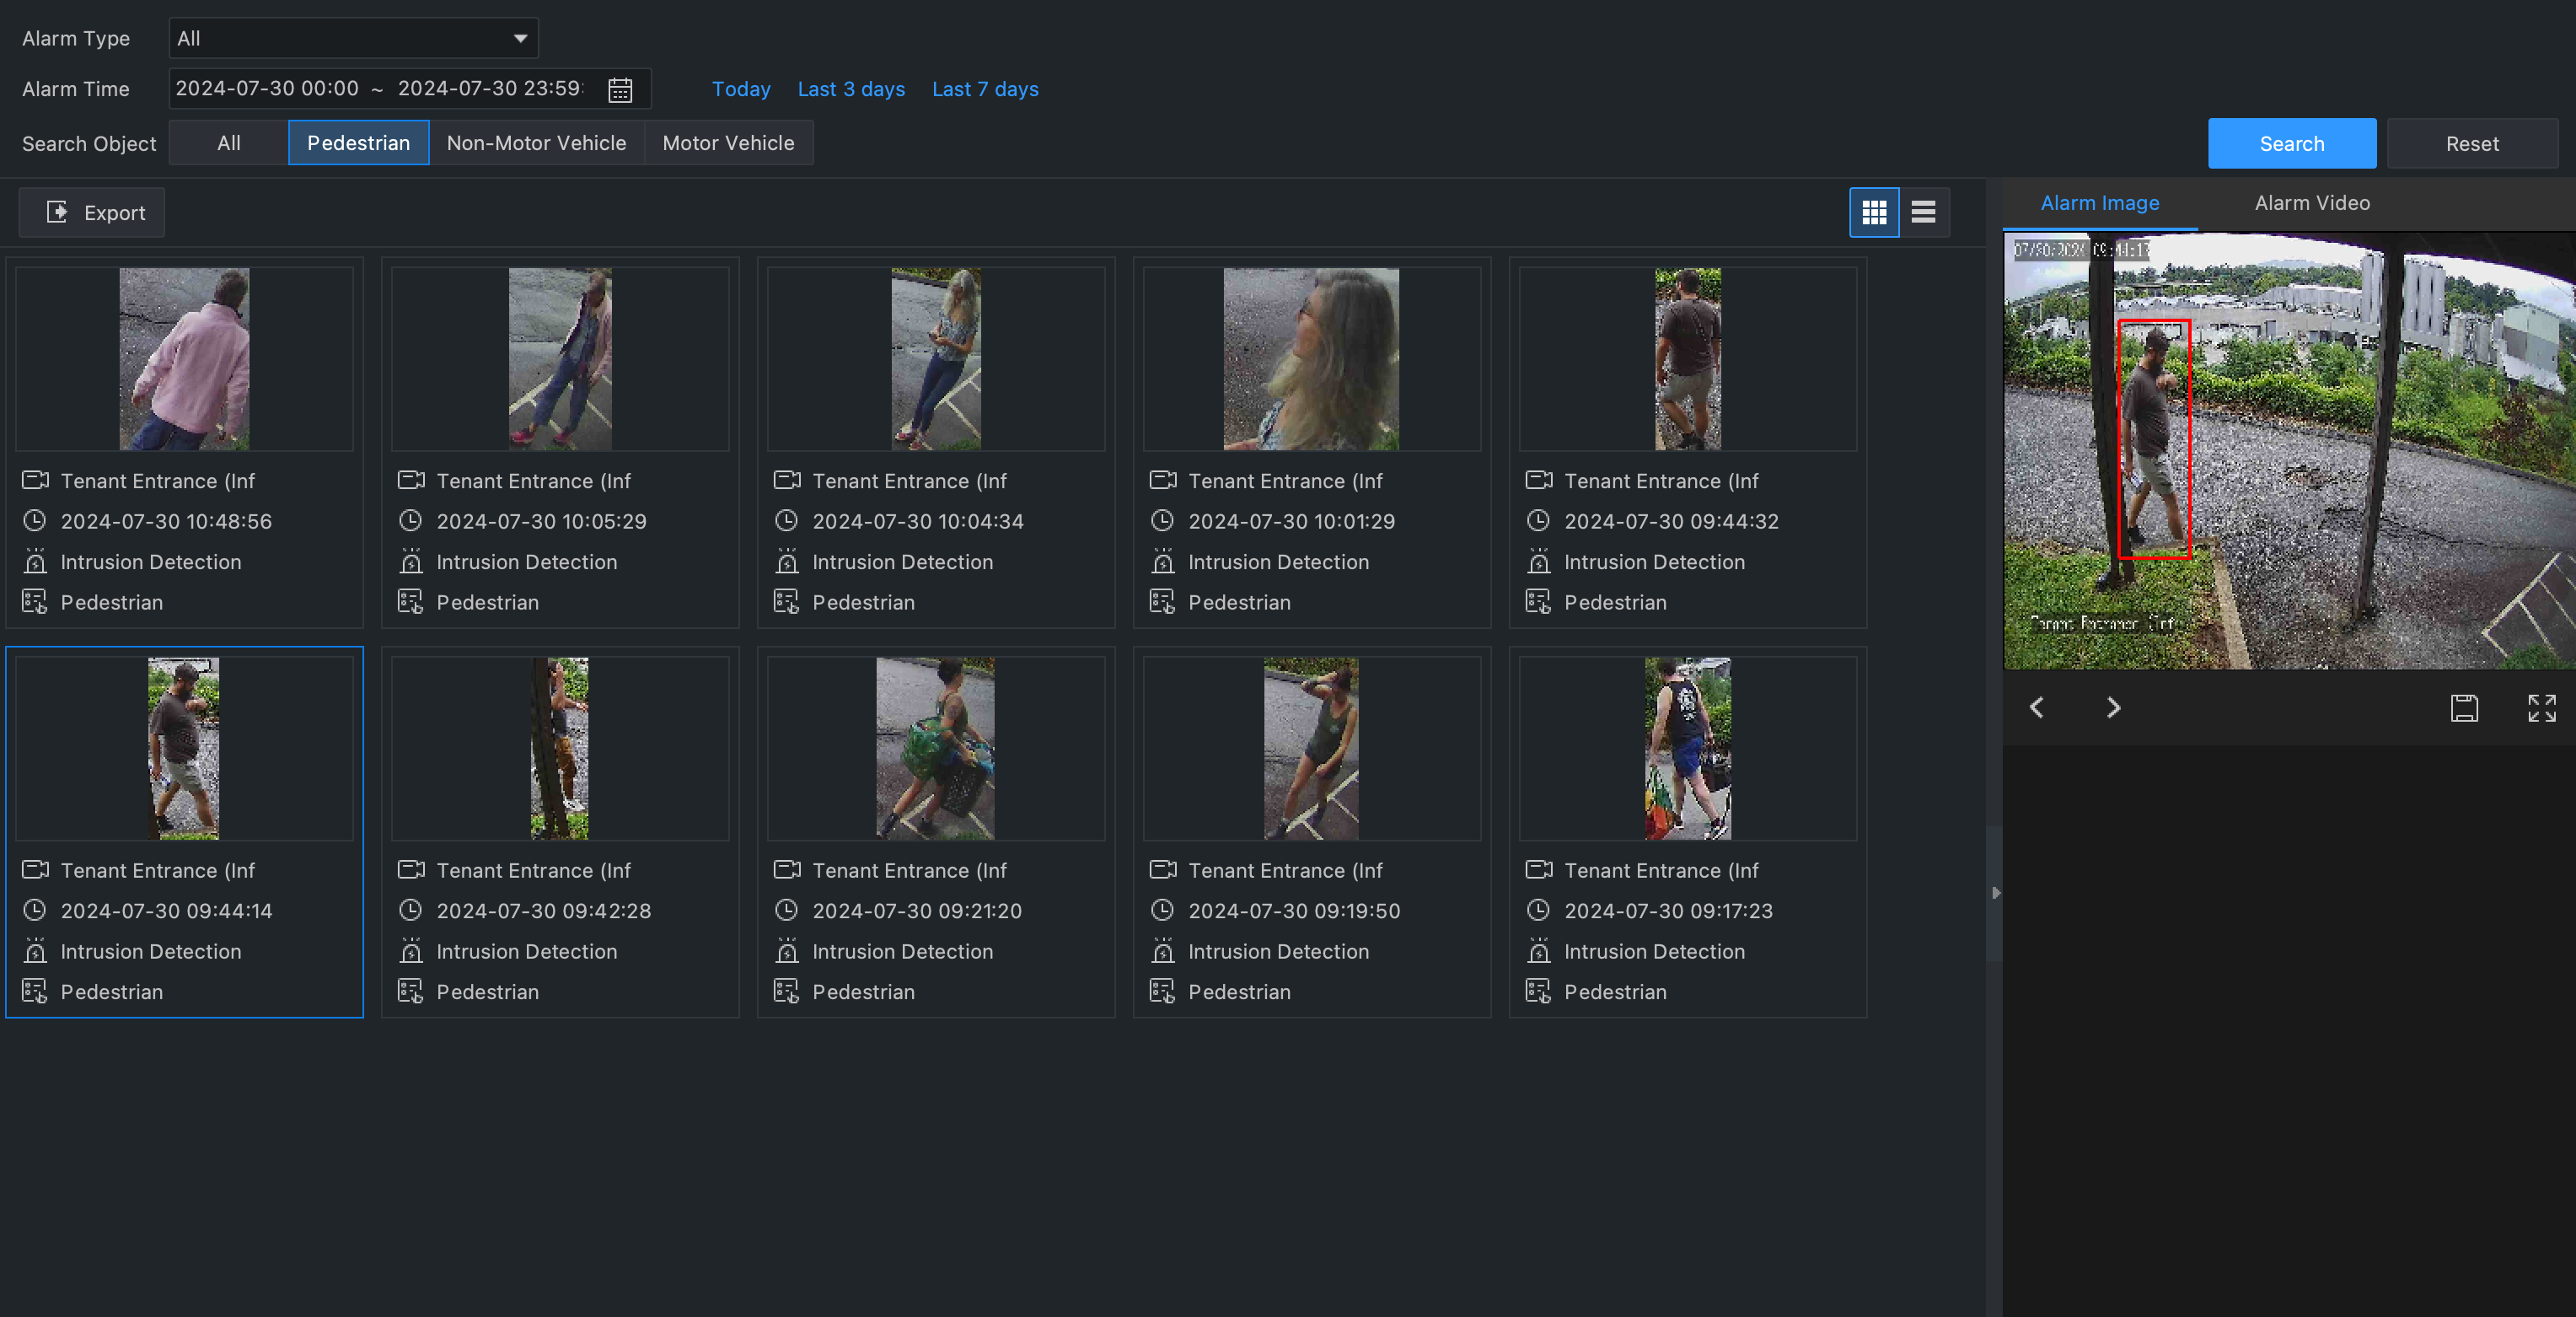
Pedestrian Search
The Pedestrian VCA search section allows you to utilize our built in AI enhanced camera analytics in a visual search. Easily see all events with a person in them. View snapshots and footage, download with just a click. Export event data and snapshots into a CSV file.
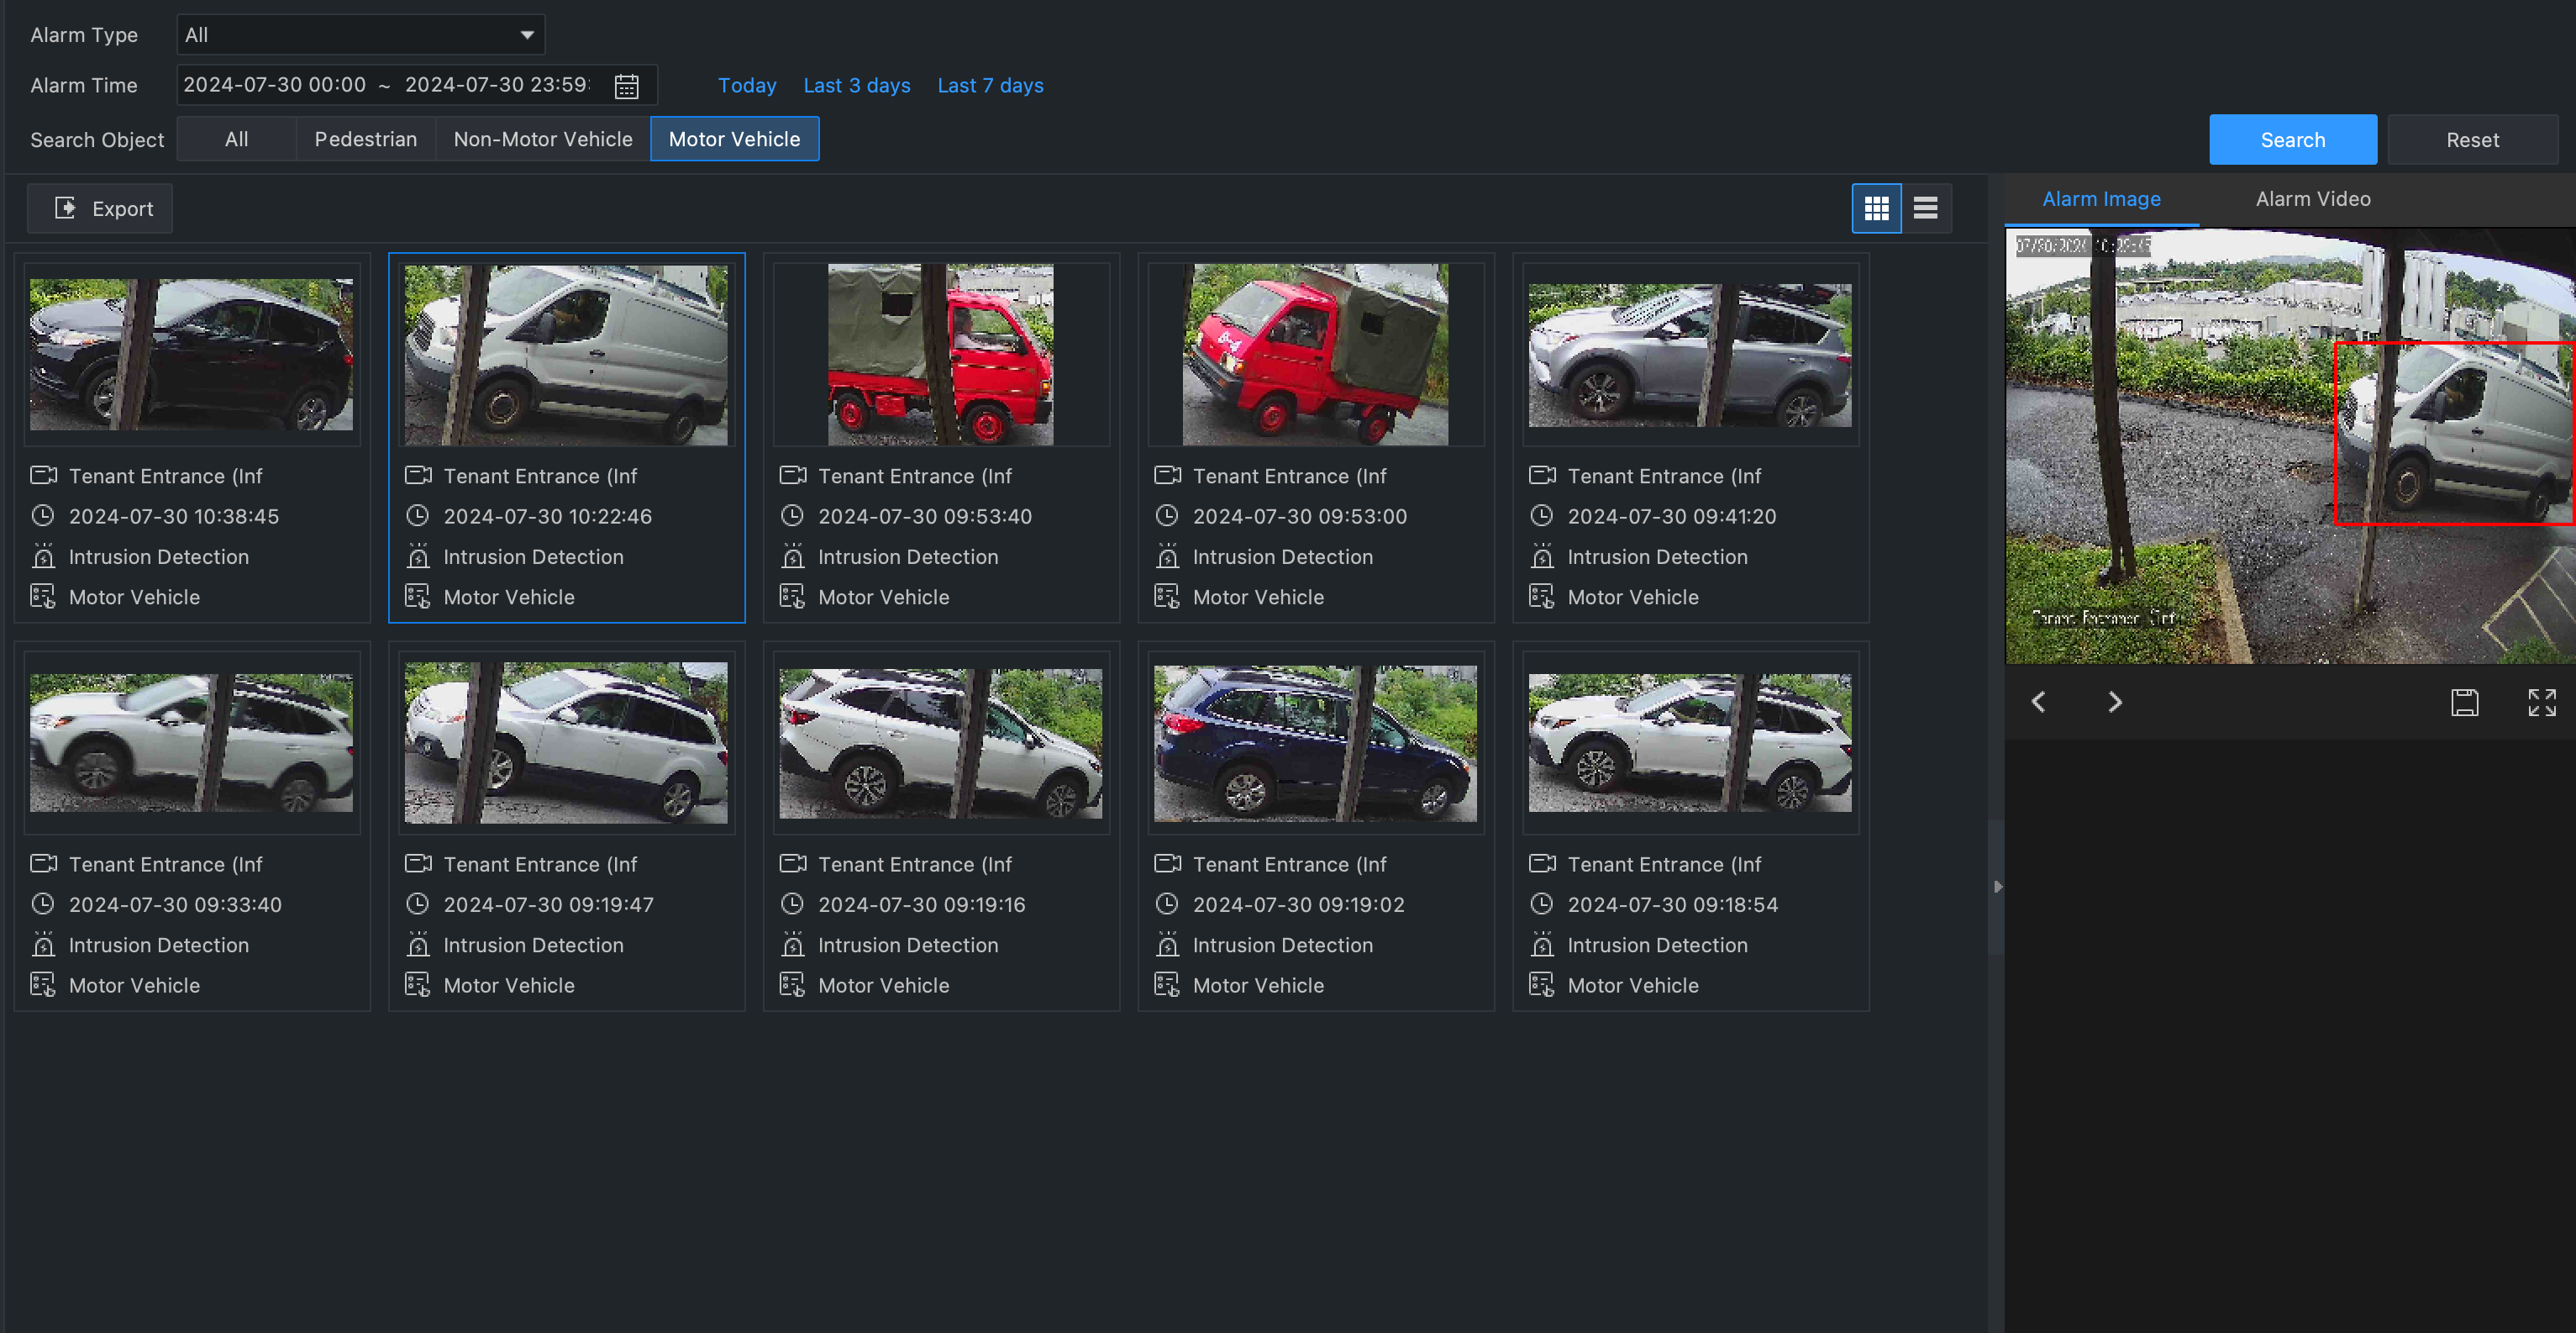
Vehicle Search
The Vehicle VCA search works just like the people search but for car and trucks instead of people.
Save and export footage with the click of a button
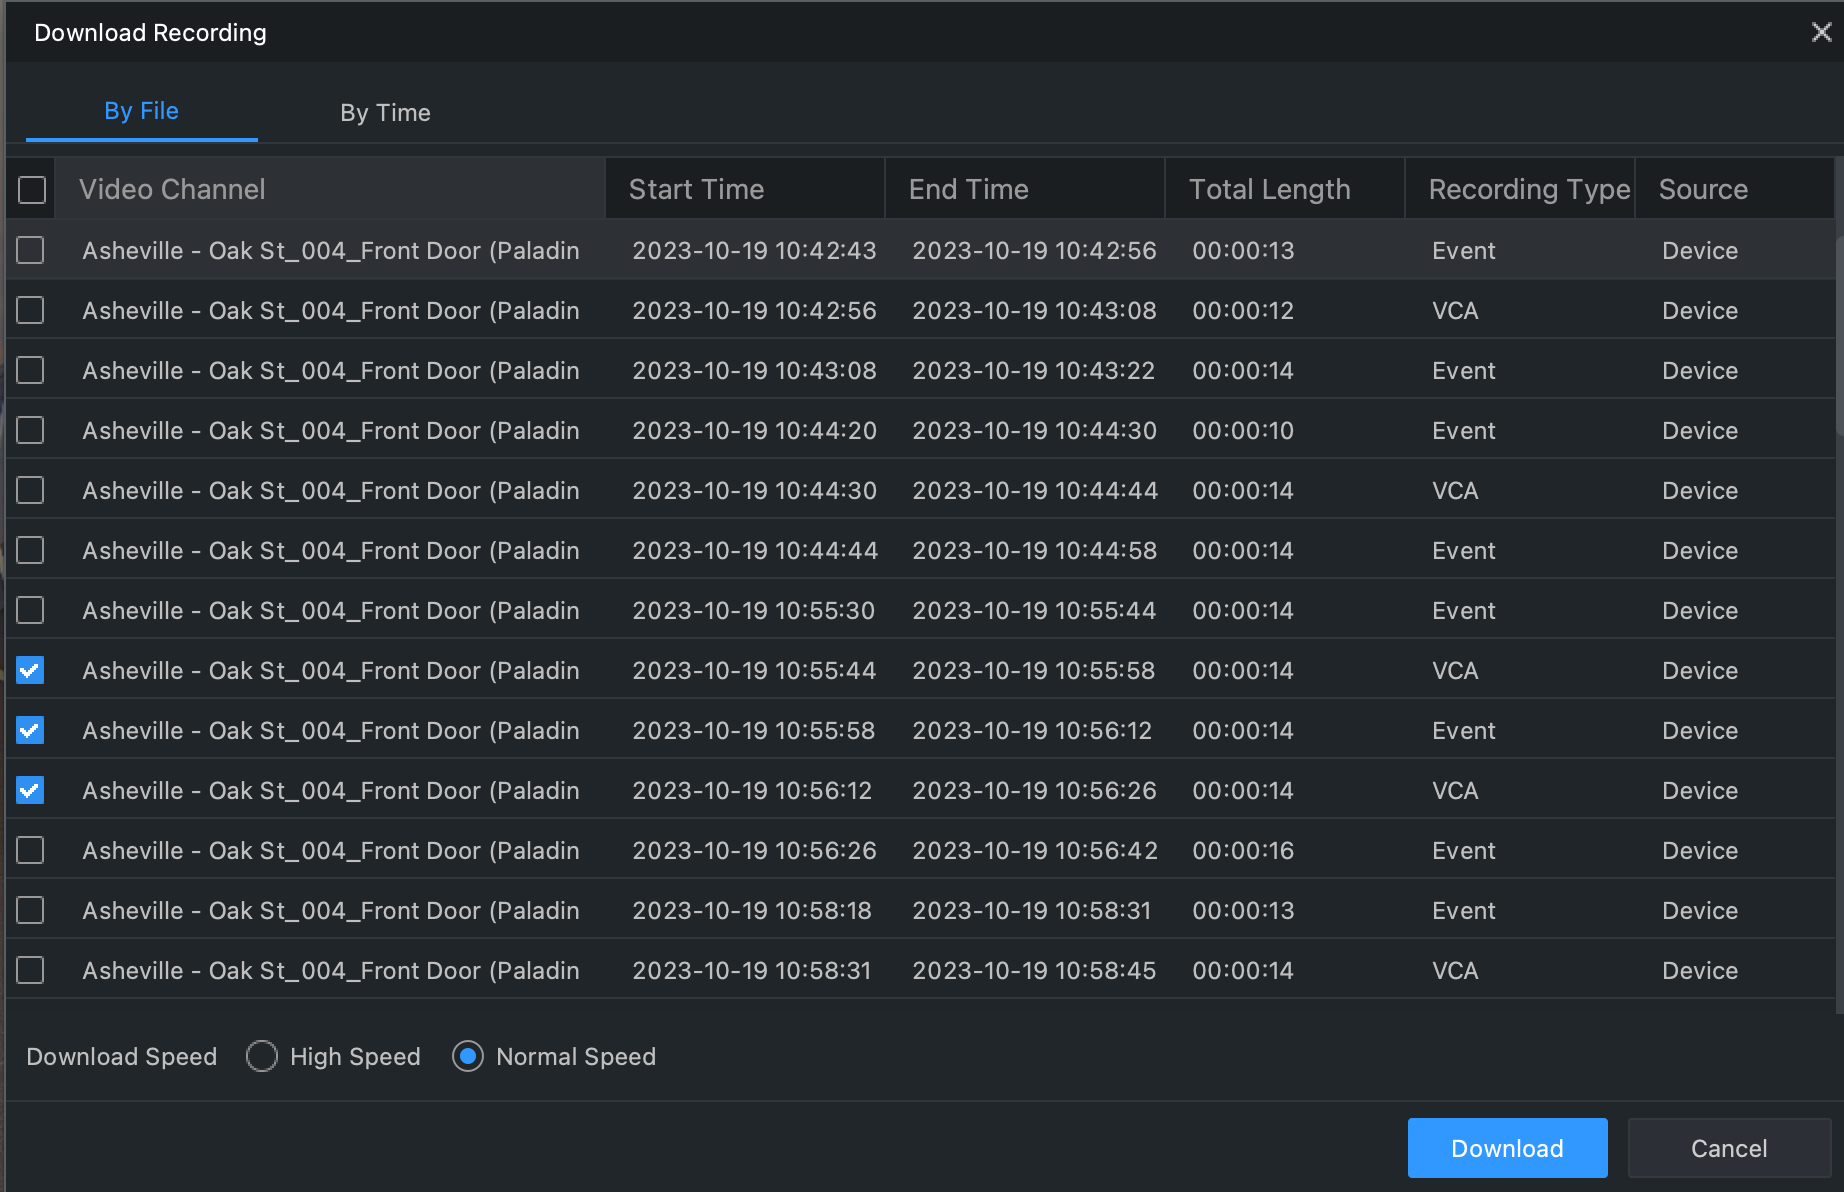
One way to export footage is by using the clipping function. This is a great way of exporting a small clip from a larger incident. To clip an incident, click the ‘scissor’ icon at the bottom left of the footage and this will begin your clip. From there you can either fast forward or click ahead and once you’re done simply click the scissor icon again to end your clip. The start and end time of your clip will appear which you can also edit if required.
Once you click ‘OK’ your clip will instantly be downloaded to your computer as an mp4 file.
Another option for exporting footage is the download button. If you click the download button in the bottom right you’ll see all of the motion clips from throughout that day. From the list, you can choose one or multiple clips to download. If you want to download a clip from a specific timeframe, simply click the ‘By Time’ tab and specify what time you want.
Easily add cameras to your SCW Viewstation
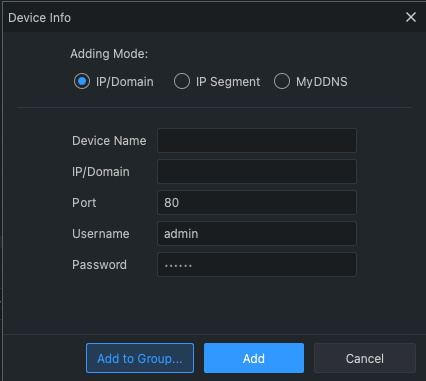
IP Address
With SCW Viewstation you can easily add cameras by IP address, which is useful for local IPs, VPNs or remote accessible IPs.
Star4Live cloud relay
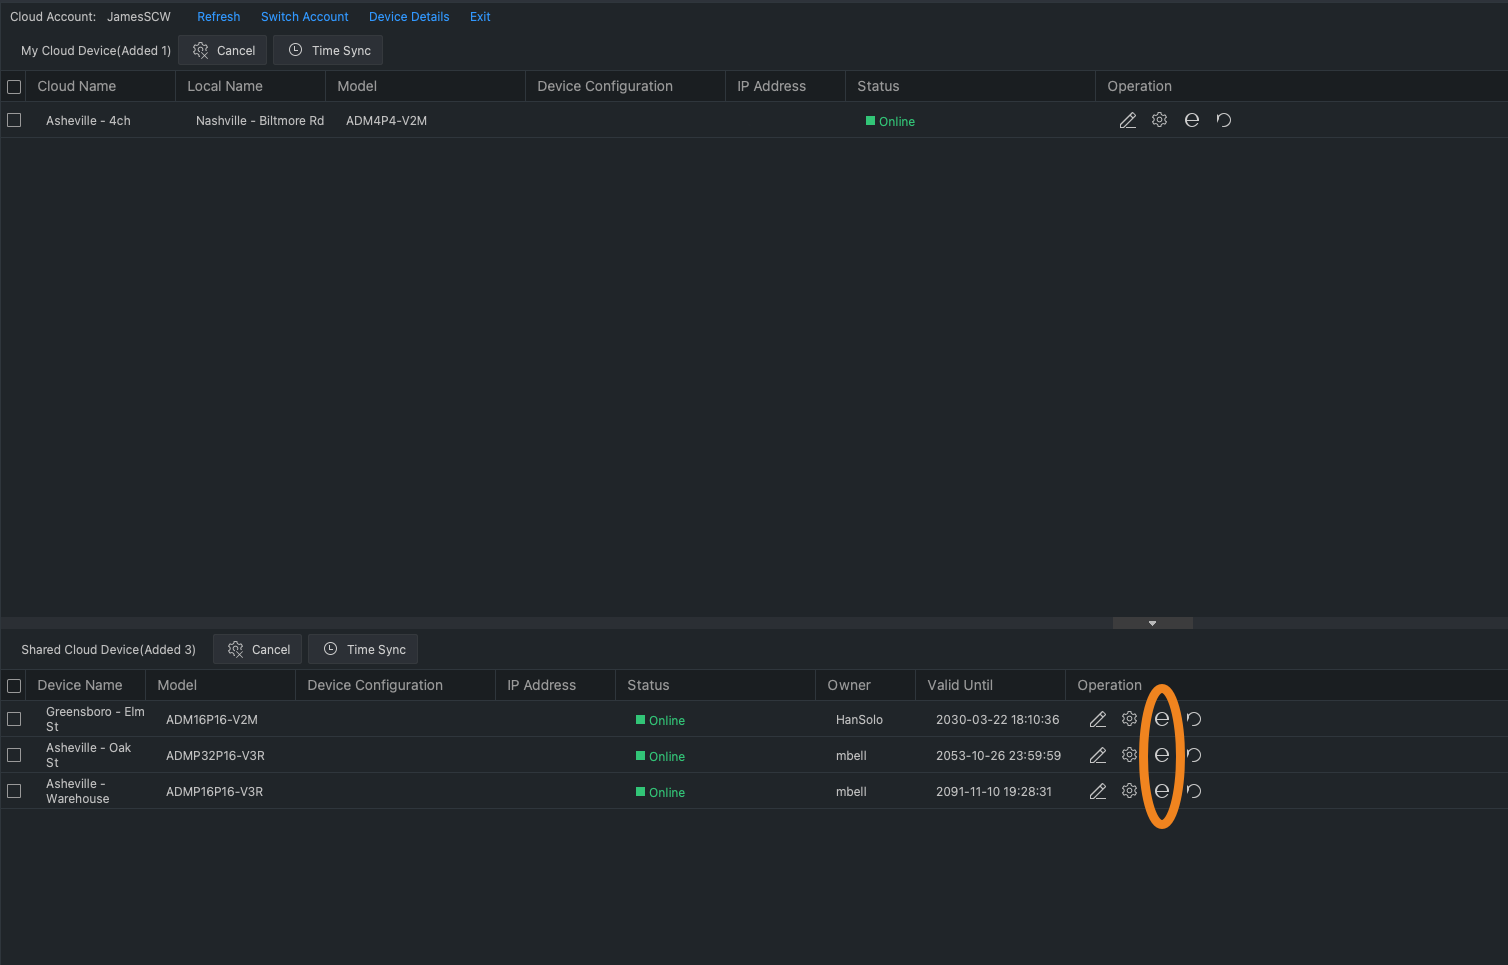
SCW Viewstation is also compatible with the Star4Live cloud relay service built into our NVRs. Simply log into your Star4Live account and it will import all the devices that you own or are shared with you - it’s that simple.

NVR Web Interface
Viewstation as its name implies is primarily for viewing but you can also access the web interface of the NVR to access all of the settings simply by clicking the ‘e’ icon on the right-hand side of the NVR. In the web interface, you can access nearly all of your NVR settings, such as scheduling, coding settings and so on.
If you have any more questions, want to know more or would like to get a personalized demo, get in touch.
