How to Change the AI Confidence Level in Survail
AI Computer Vision returns a percentage likelihood that an object matches the model. Increasing or decreasing the confidence levels will change the amount of confidence the model requires to for Survail to include or remove events as having occurred.
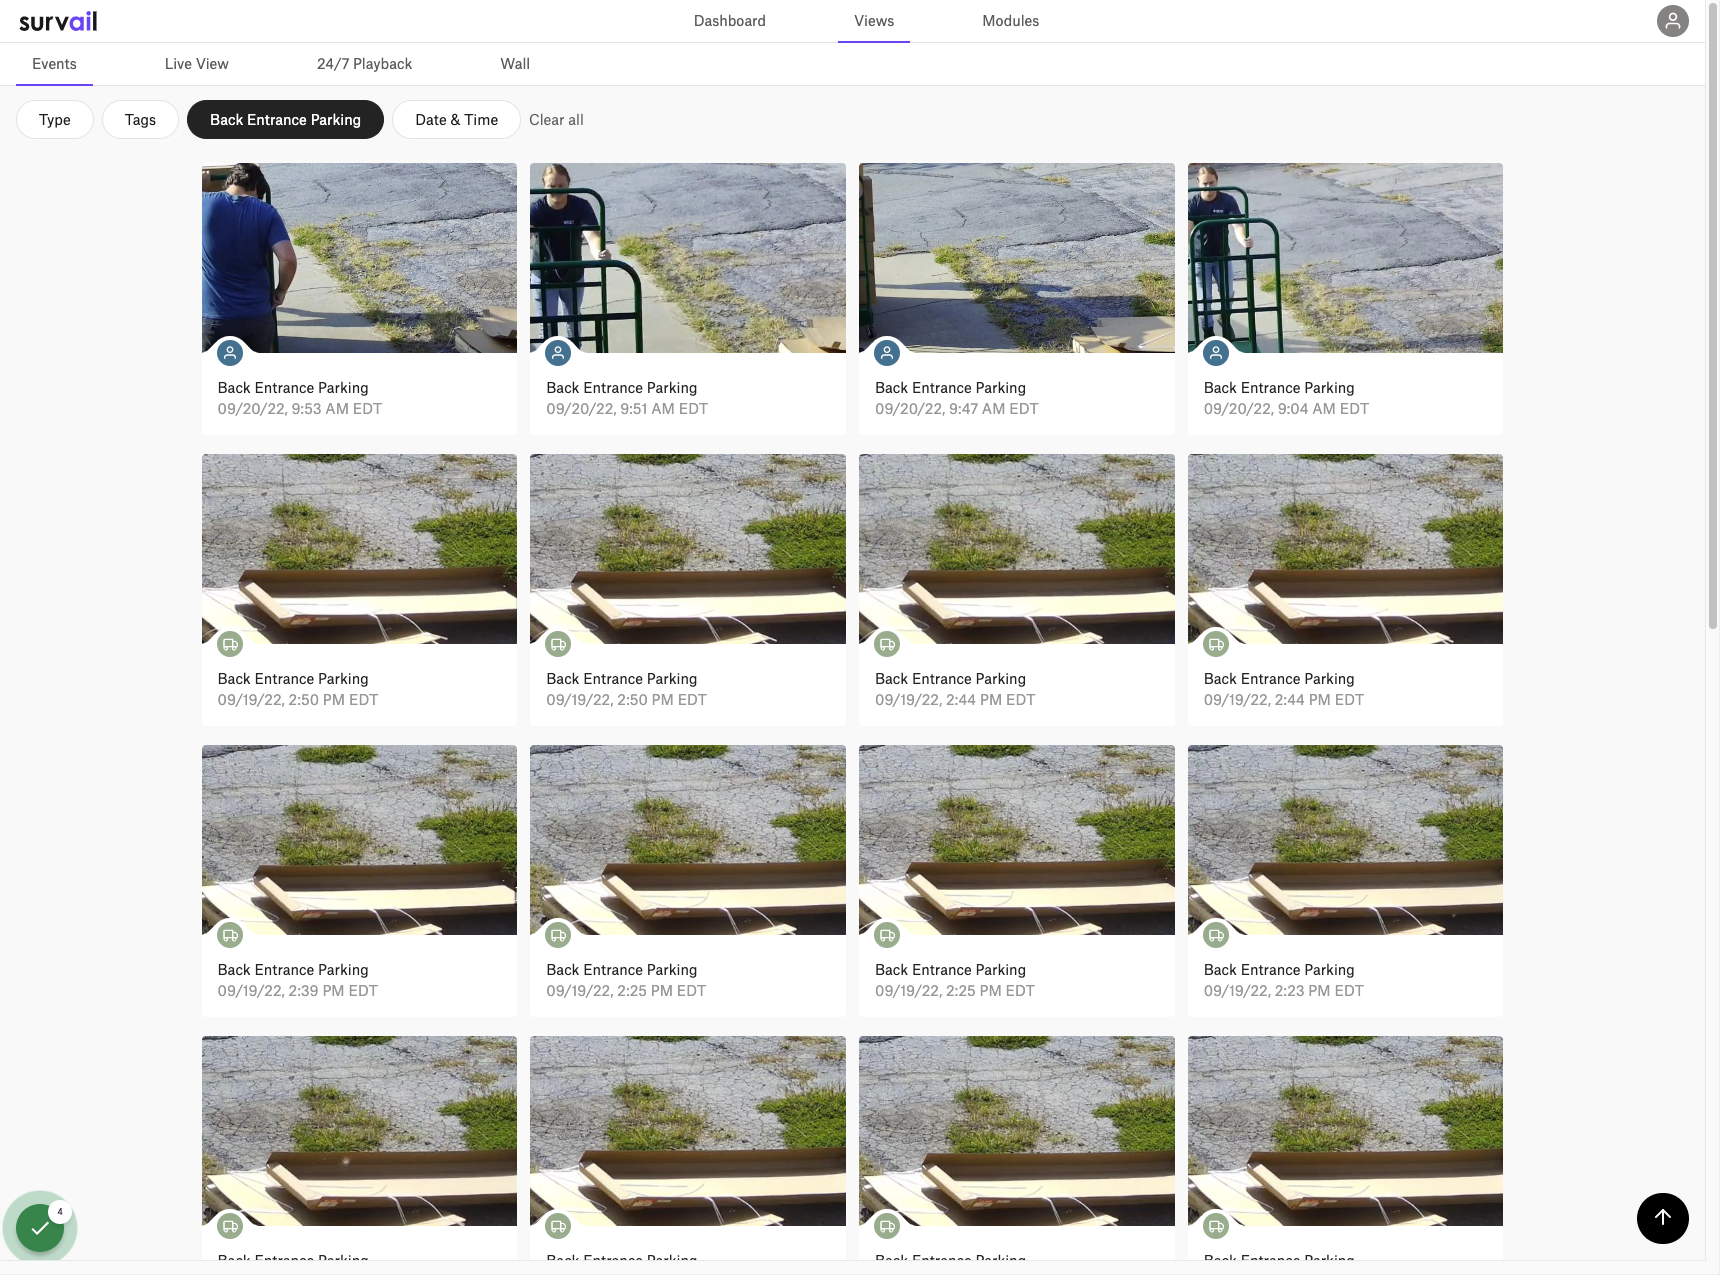
Example of Problem
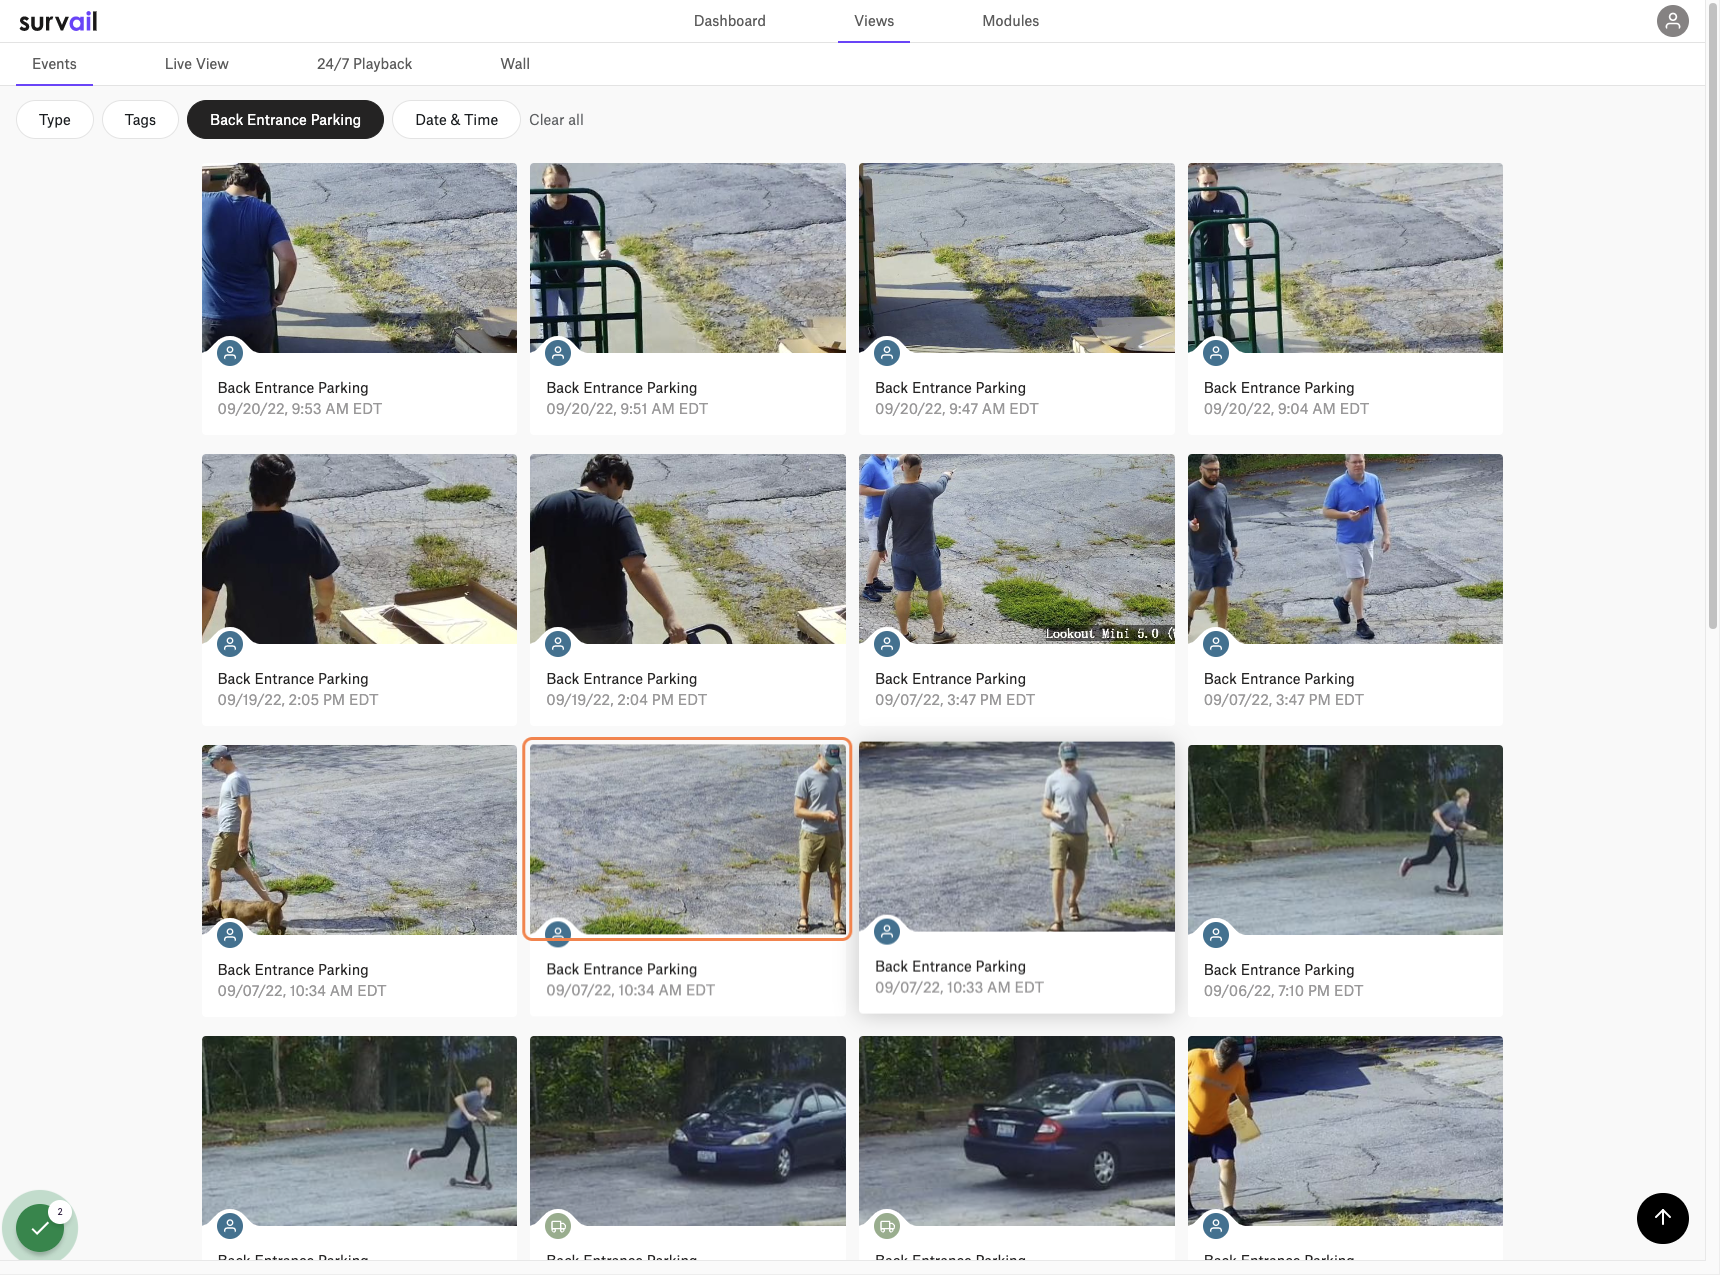
In this image, you can see that Survail has incorrectly understood a pallet of cardboard boxes as a vehicle.
What is Confidence, Anyways?
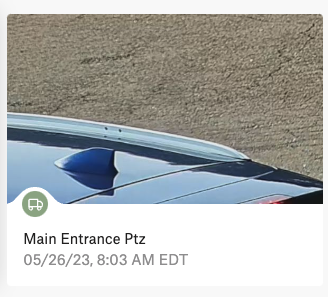
Computer Vision doesn't return a "yes" or "no" answer. It returns a percentage likelihood that the object is the thing it is looking for. Increasing the confidence threshold from say Medium to High required the AI to estimate a higher likelihood of the object being a vehicle for the event to show in the Survail UI as a "yes." In real terms this means that survail is going to tell you that things are vehicles when it sees more of the object or sees the object in more detail. In this example, you can see that by increasing the confidence threshold, the bad detections from the earlier example have been removed, but it probably would also not tell you if it saw a partial vehicle either. This is what Survail thinks this image is: the roofline of a vehicle. As you can see, the shape of the pile of cardboard and the top of this vehicle share a lot of visual similarity. If this car had a roof rack, they would look even more alike. You can't tell it in the screenshot above, but the fact that the pallet is being rolled around also made it move in a similar manner to a vehcile.
Requiring Higher Confidence
Log In To Survail
You can log into Survail at https://app.survail.com/.

Click the User Icon and then "Config"
At the top right side of the screen, you can see the user icon. After clicking on the user icon, you can choose to edit settings by clicking "Config". This will lead you to the "Camera Settings" page within the Config submenu.
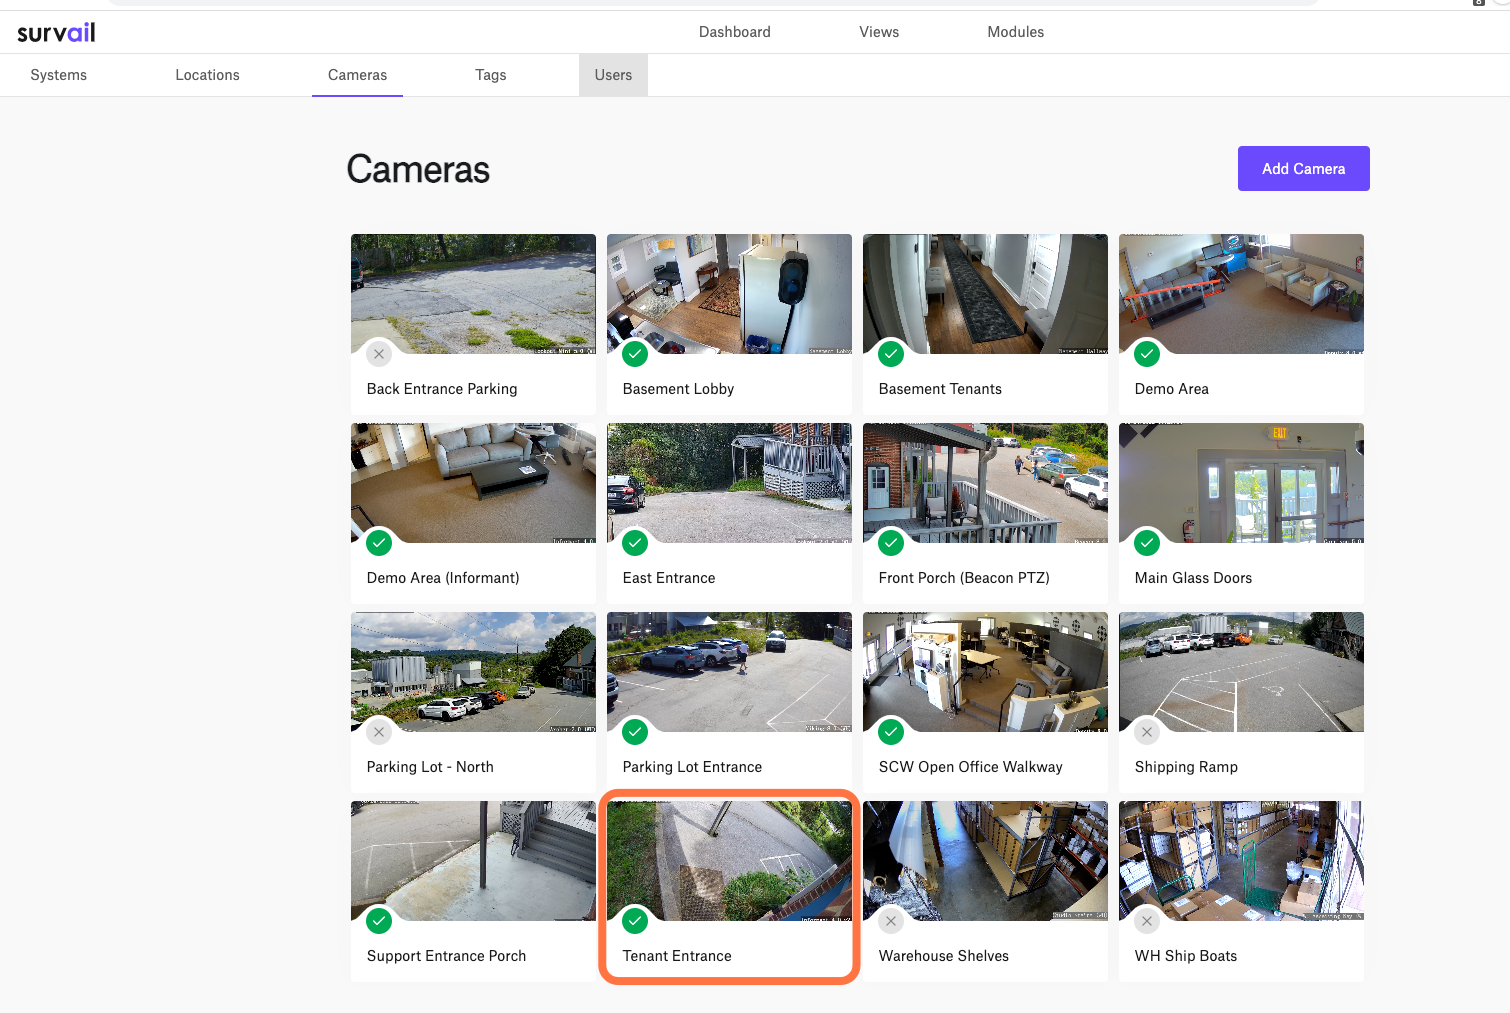
Click on a Camera Card
The entire card is clickable and takes your to that camera's settings detail page. If you are logged out after clicking this, your user account is not allowed to view or edit settings.
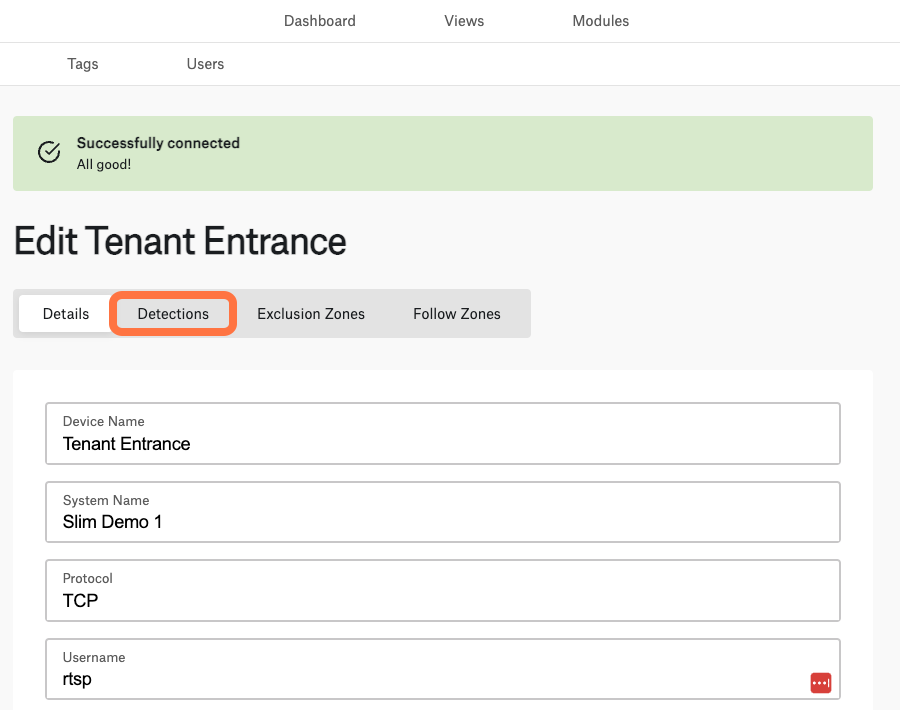
Click on the "Detections" Tab
On the camera's settings detail page, you want click on the "detections" tab, as highlighted in this screenshot.
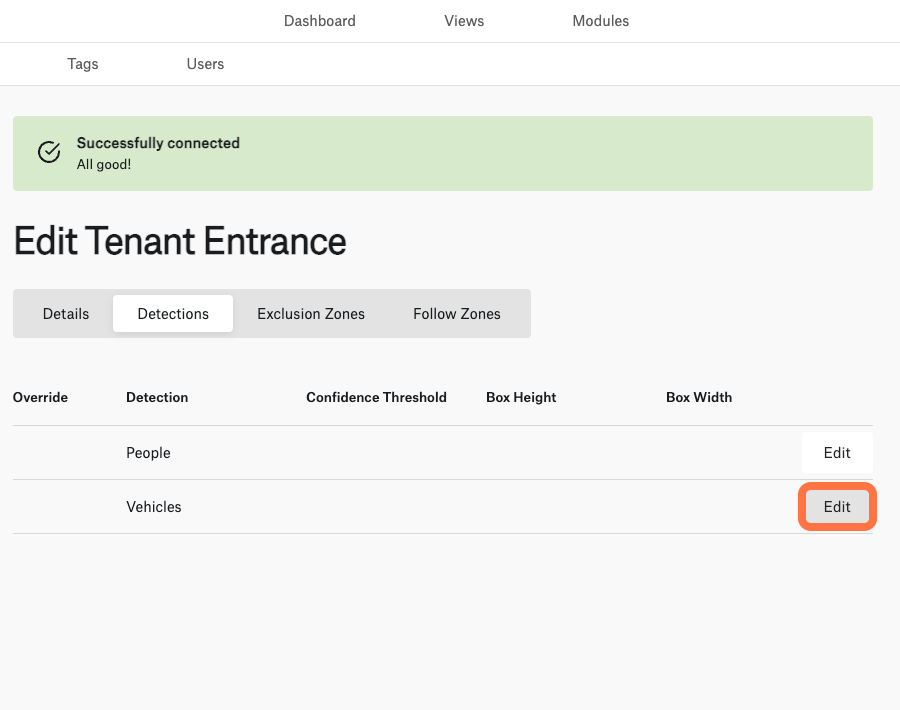
Edit Detection Settings
On the detection settings, you will want to edit the detections tab for the detection type that you want to modify. In this case, we want to change the minimum size of a vehicle so that we don't get alerts for .
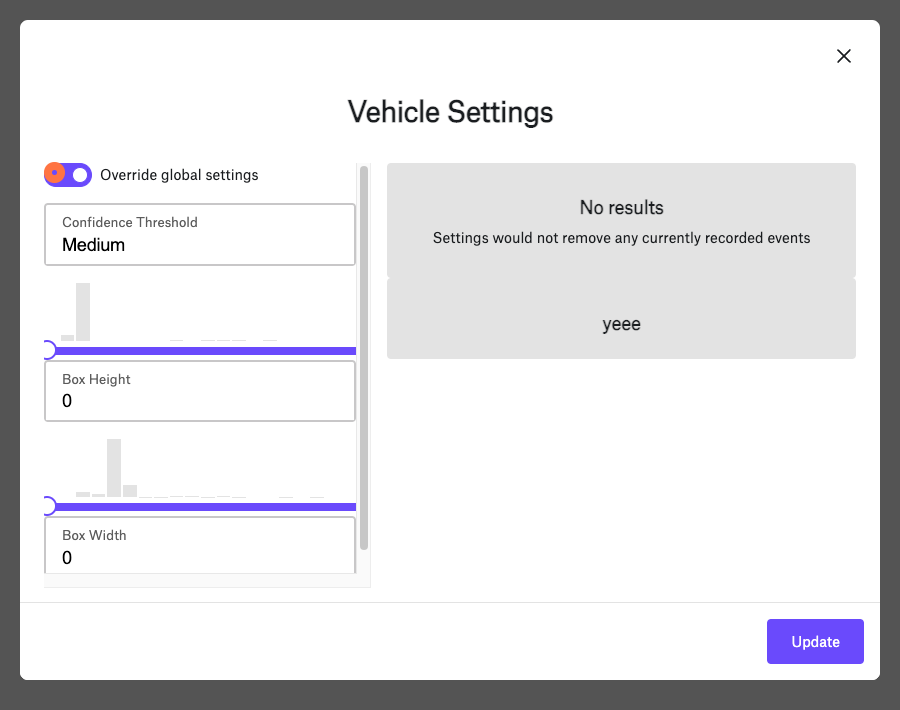
Override Global Settings
One of the easiest things to forget is to turn on the "override global settings" toggle button. This is an important step that was created so that you can help your community without clurring up your event feed or creating unnecessary alerts. At the end of this guide, we will explain why this tool exists.
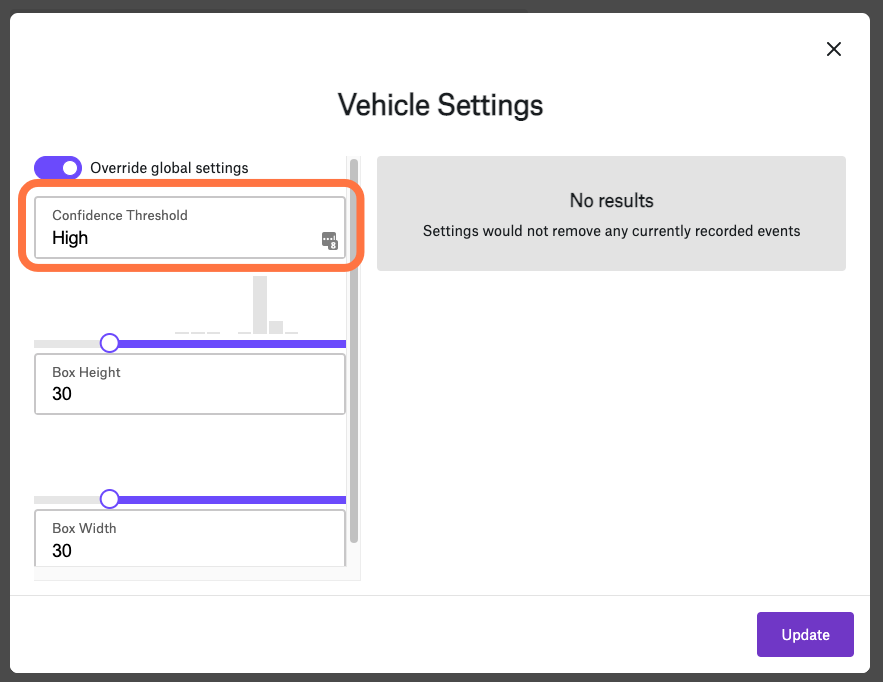
Set Confidence Level
The Confidence Level field can be set to "Off," "Low," "Medium," or "High." By default, most systems are set to Medium. We recommend setting wooded areas to high and to then possibly set individual cameras to high if you notice issues with the model performance. When you are done, make sure you hit "Update."
Of Higher Confidence

Returning to the Problem
Looking again at the original issue, please note the four people detections in the first row.
Short Term Result:
In this scenario, switching to high confidence removed all instances of the bad detection. (Again, note the first row of detections are the same.)
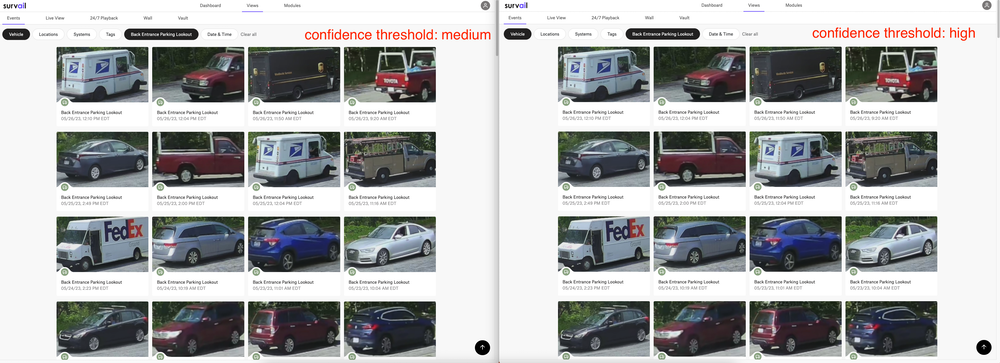
Long Term Result:
In this scenario, removing the pallet jack with the cardboard boxes resolved the problem. In the adjacent image, you can see the more recent vehicle detections from that camera at both medium and high confidence level. There's no difference in detections once the pallet jack of cardboard had been removed. We recommend Medium whenever it does not produce consistently bad results, because low light and night vision footage have lower detail.
