How to Create A Exclusion Zone in Survail
Exclusion Zones suppress alerts and events within a predefined area.
When to use an Exclusion Zone?
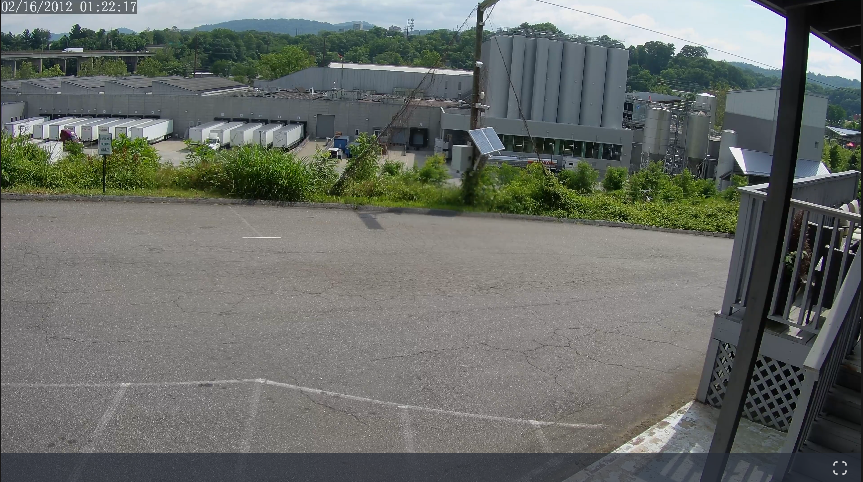
Multi-Property Views
This camera view allow you to see cars on a highway and the trucks on our neighbor New Belgium Brewery's property. You can use minimum object size rules to limit the alerts on the highway, but sometimes creating a minimum object size rule for large vehicles like Semis might also rule out smaller vehicles, like a compact car, on the areas you actually care about (in this case, the driveway).
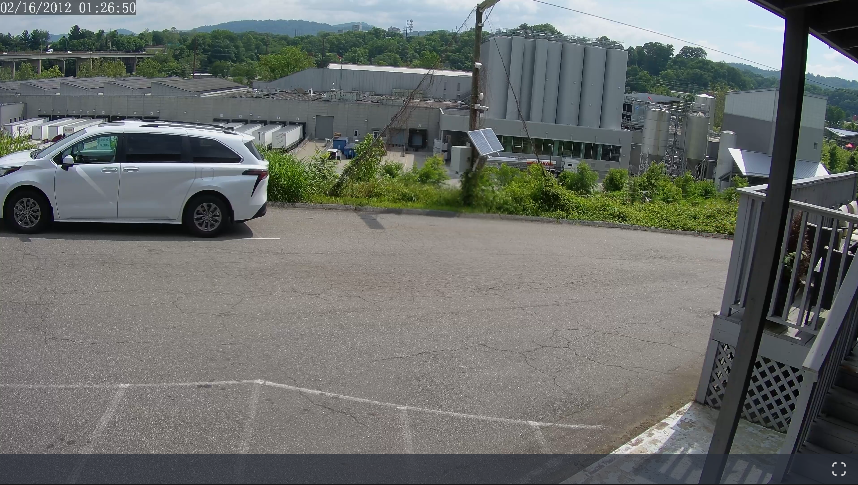
Parking Spaces
In the same way, you probably don't want to be constantly alerted to the presence of a vehicle in this parking spot. Additionally, since it is roughly the same size as a vehicle passing by the driveway, a minimum object size rule won't work at all.
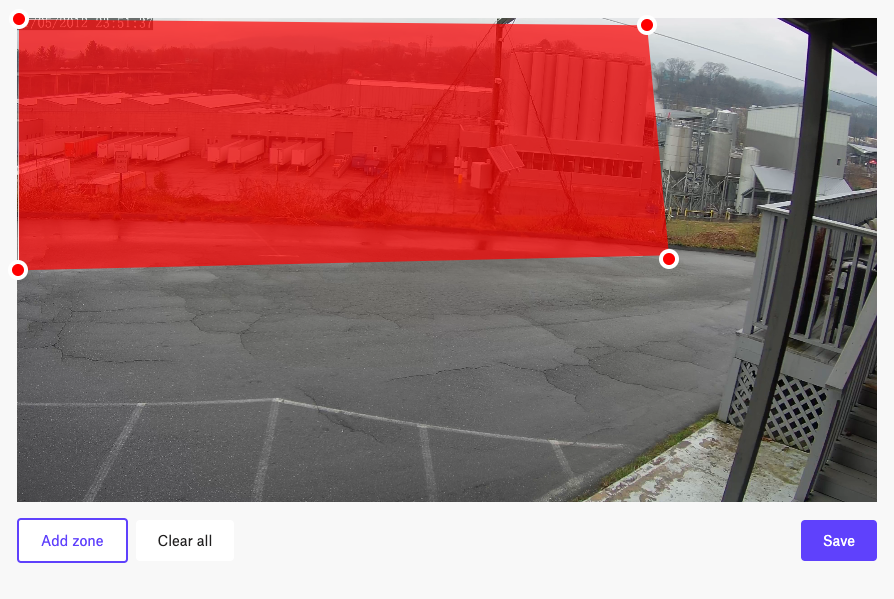
Example Area
We really don't want alerts to be created for this area.
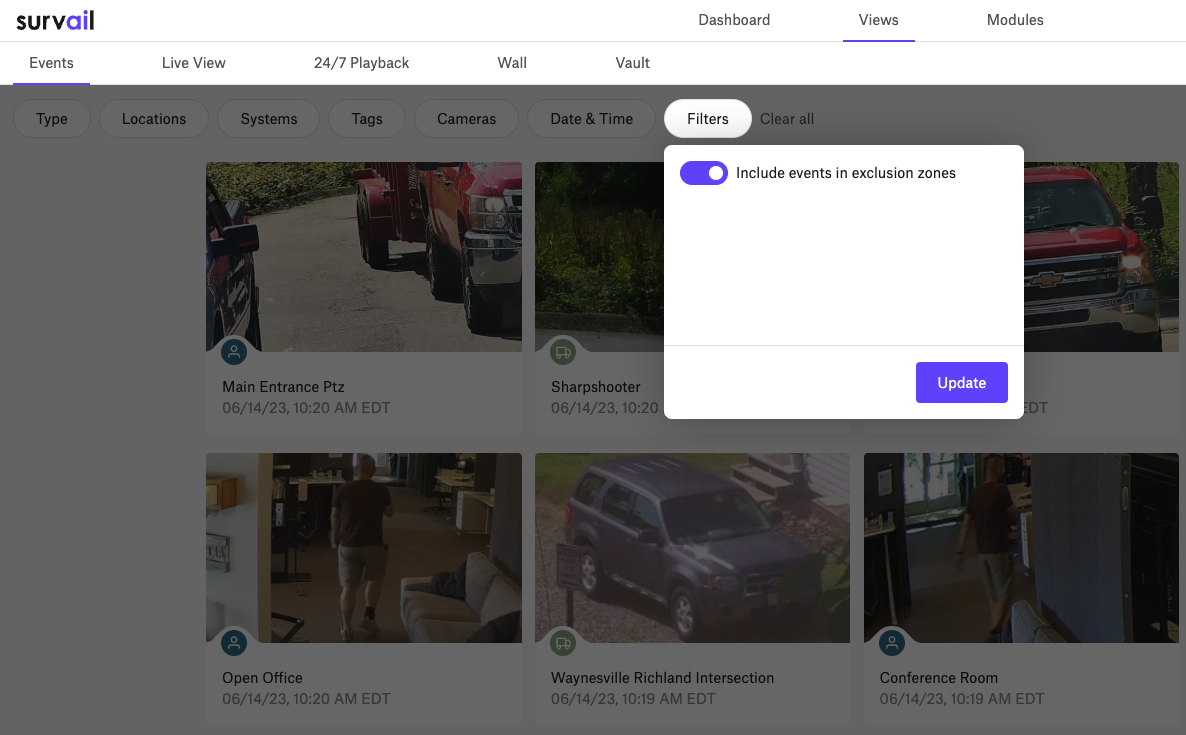
Exclusion Zones Reduce Visibility and Suppress Alerts; they do not remove footage
Events that occur in exclusion zones can be found, if you need to do so. Toggling "include events in exclusion zones" allows you to see the vehicle or people events in areas that may not normally matter to you. This is useful if you're trying to help the police with a crime on your neighbor's property or determining when and how a vehicle parked in an exclusion zone was damaged by a tree.
How To Create an Exclusion Zone
Log In To Survail
You can log into Survail at https://app.survail.com/.

Click the User Icon and then "Config"
At the top right side of the screen, you can see the user icon. After clicking on the user icon, you can choose to edit settings by clicking "Config". This will lead you to the "Camera Settings" page within the Config submenu.
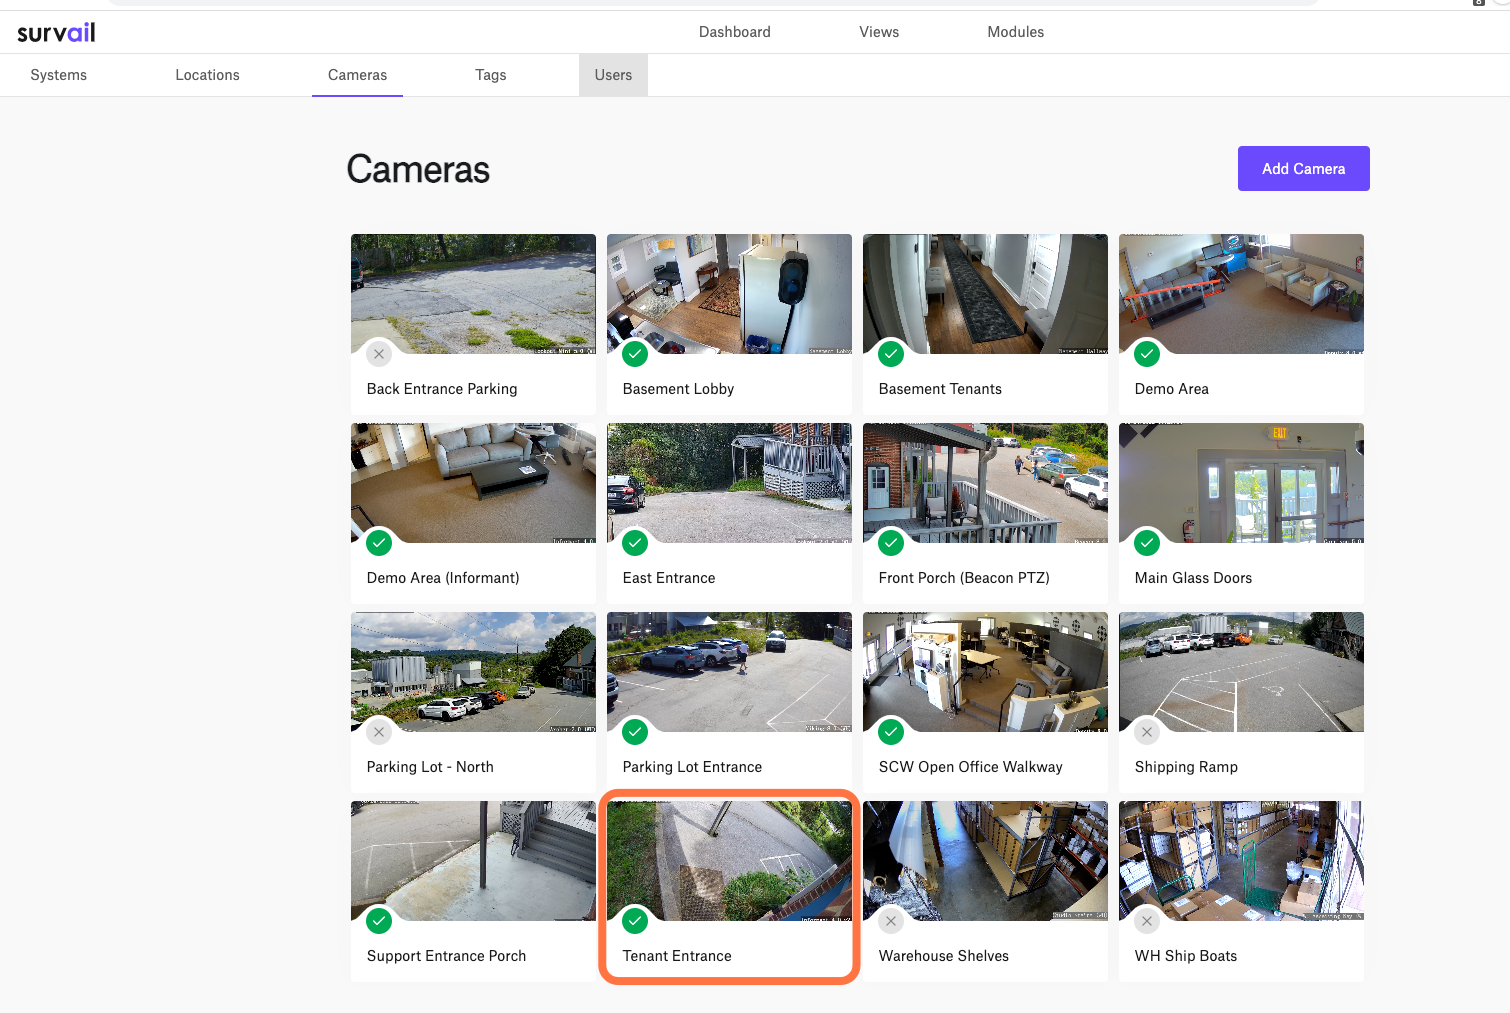
Click on a Camera Card
The entire card is clickable and takes your to that camera's settings detail page. If you are logged out after clicking this, your user account is not allowed to view or edit settings.
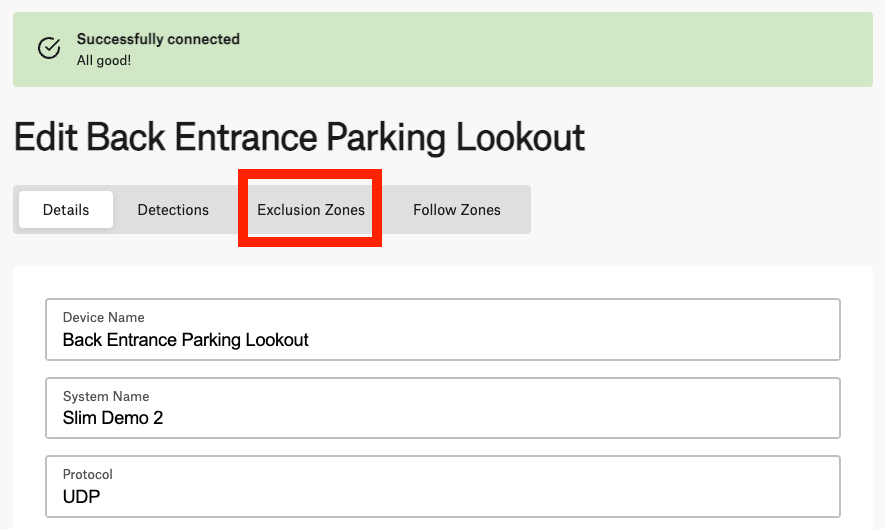
Click the Exclusion Zone Tab
On the camera's settings detail page, you want to locate the exclusion zone tab in grey above the camera details section.
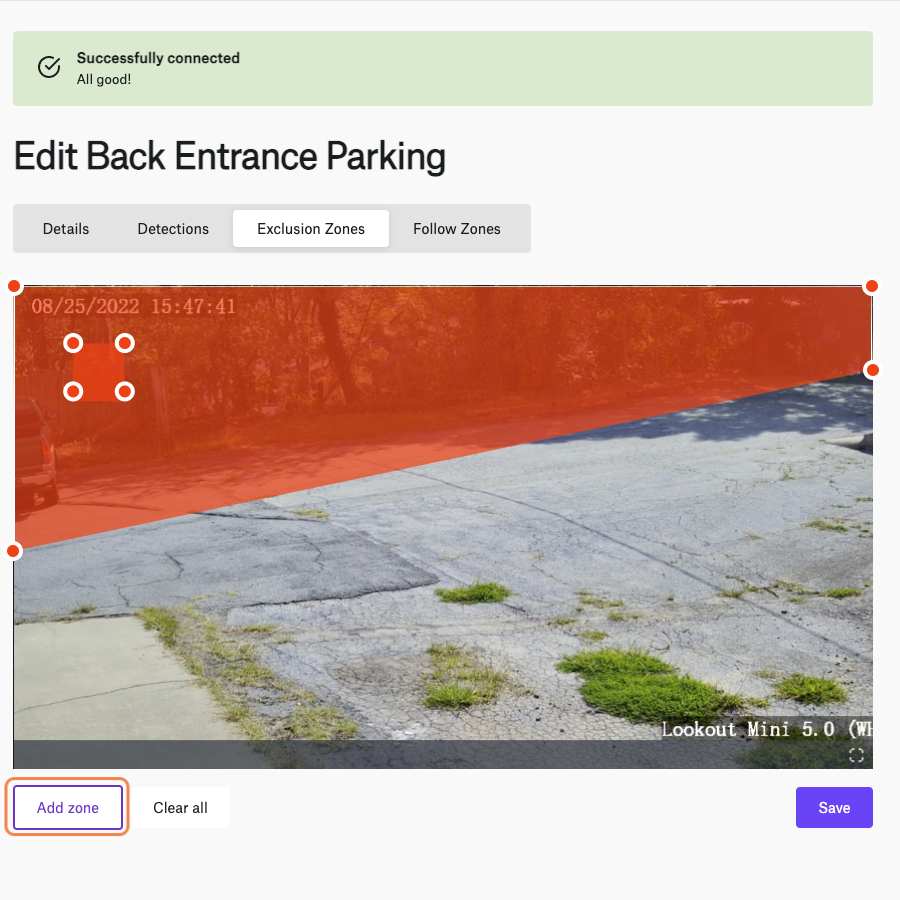
Click "Add Zone"
The zone, a red square with four nodes on the corners will be drawn in the upper right hand part of the image. This occurs whether you have zero or multiple zones already created. This image shows an existing exclusion zone (across the entire top of the image) and the new one (a perfect square).
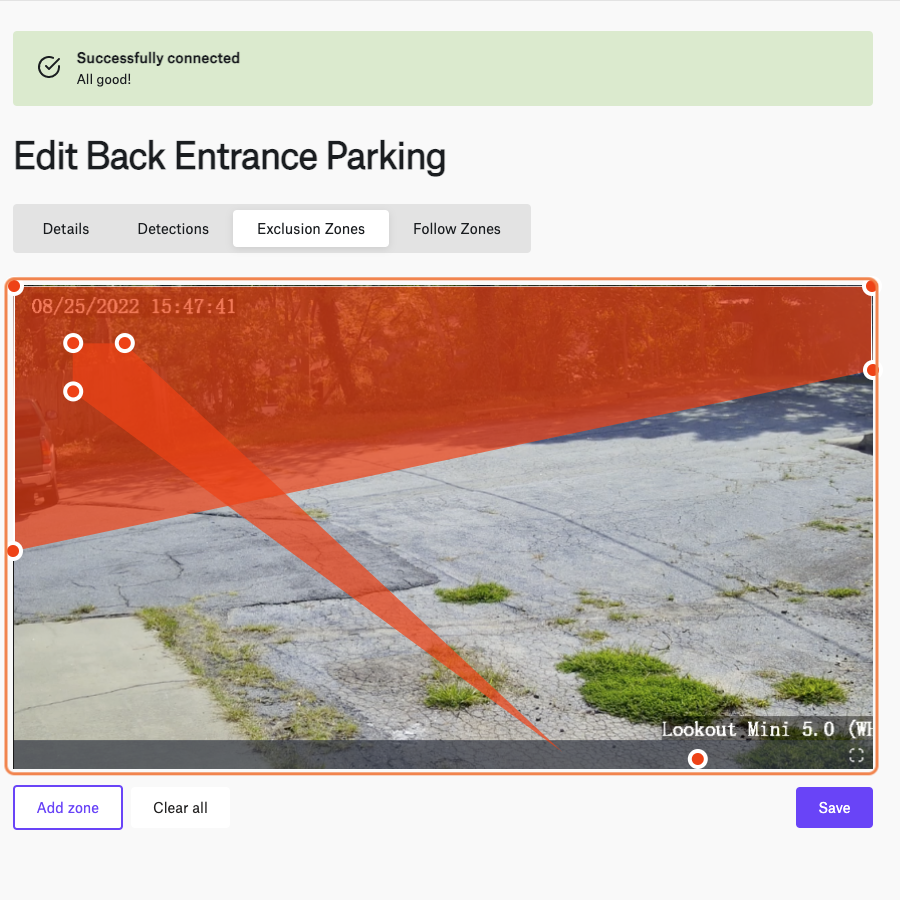
Drag Each Zone Nodes Where You Want Them
The edges of the zone are draggable. Move each one where you want them. The zone can be of any four sided shape: square, rectangle or polygon.
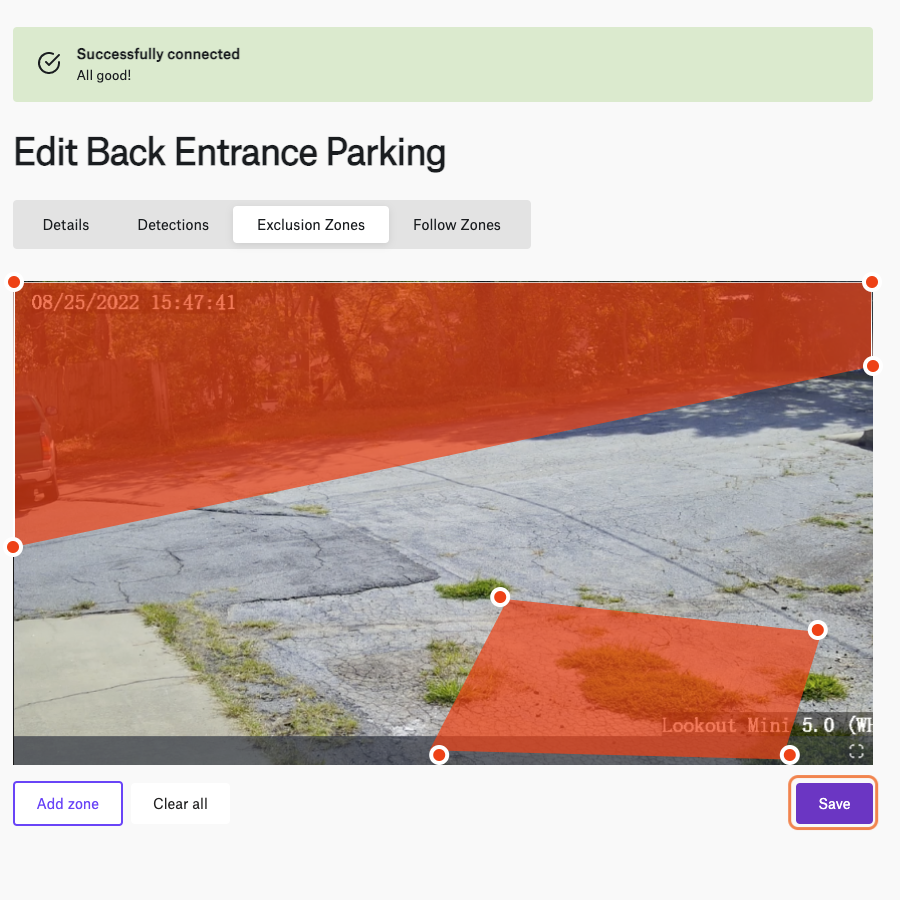
Click "Save"
Once you have positioned all four nodes where you want them, save your work.
