Moving an Event and Supplementary 24/7 Footage into Vault and creating an Incident Report in Survail
Vault is intended for long-term (lasts until you delete it) video storage for video files that contain an incident of note.
Vault moves video from the on-premises hardware into long term cloud storage that won't be overwritten. Vault allows you to tag one or multiple videos under an event and then write up an incident report about the event. Vault is intended to establish clear documentation for HR or Legal teams. Vault establishes a clear chain of custody of unedited video.
Use Vault when you need to store video for use in HR files or court cases.
Two Options:
You can move video events from the survail event viewer pages or by timestamp on the 24/7 footage viewer to vault.
Create Incident from an Event
Log In To Survail
You can log into Survail at https://app.survail.com/.
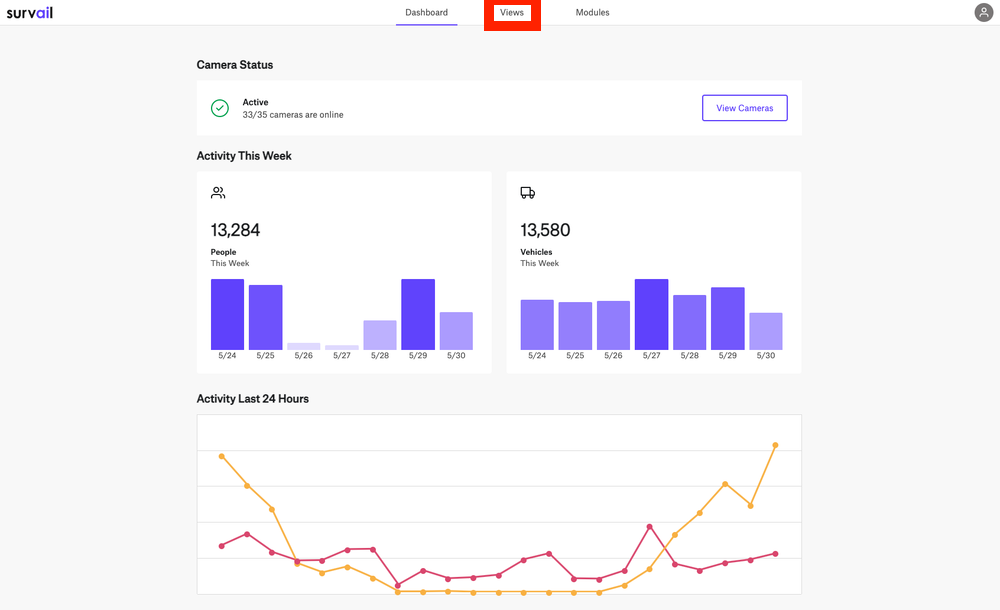
Click on "Views" in the Top Menu
At the top of the screen, you can see the main Survail Menu. Click on the "Views" Tab. This will lead you to the Events page.
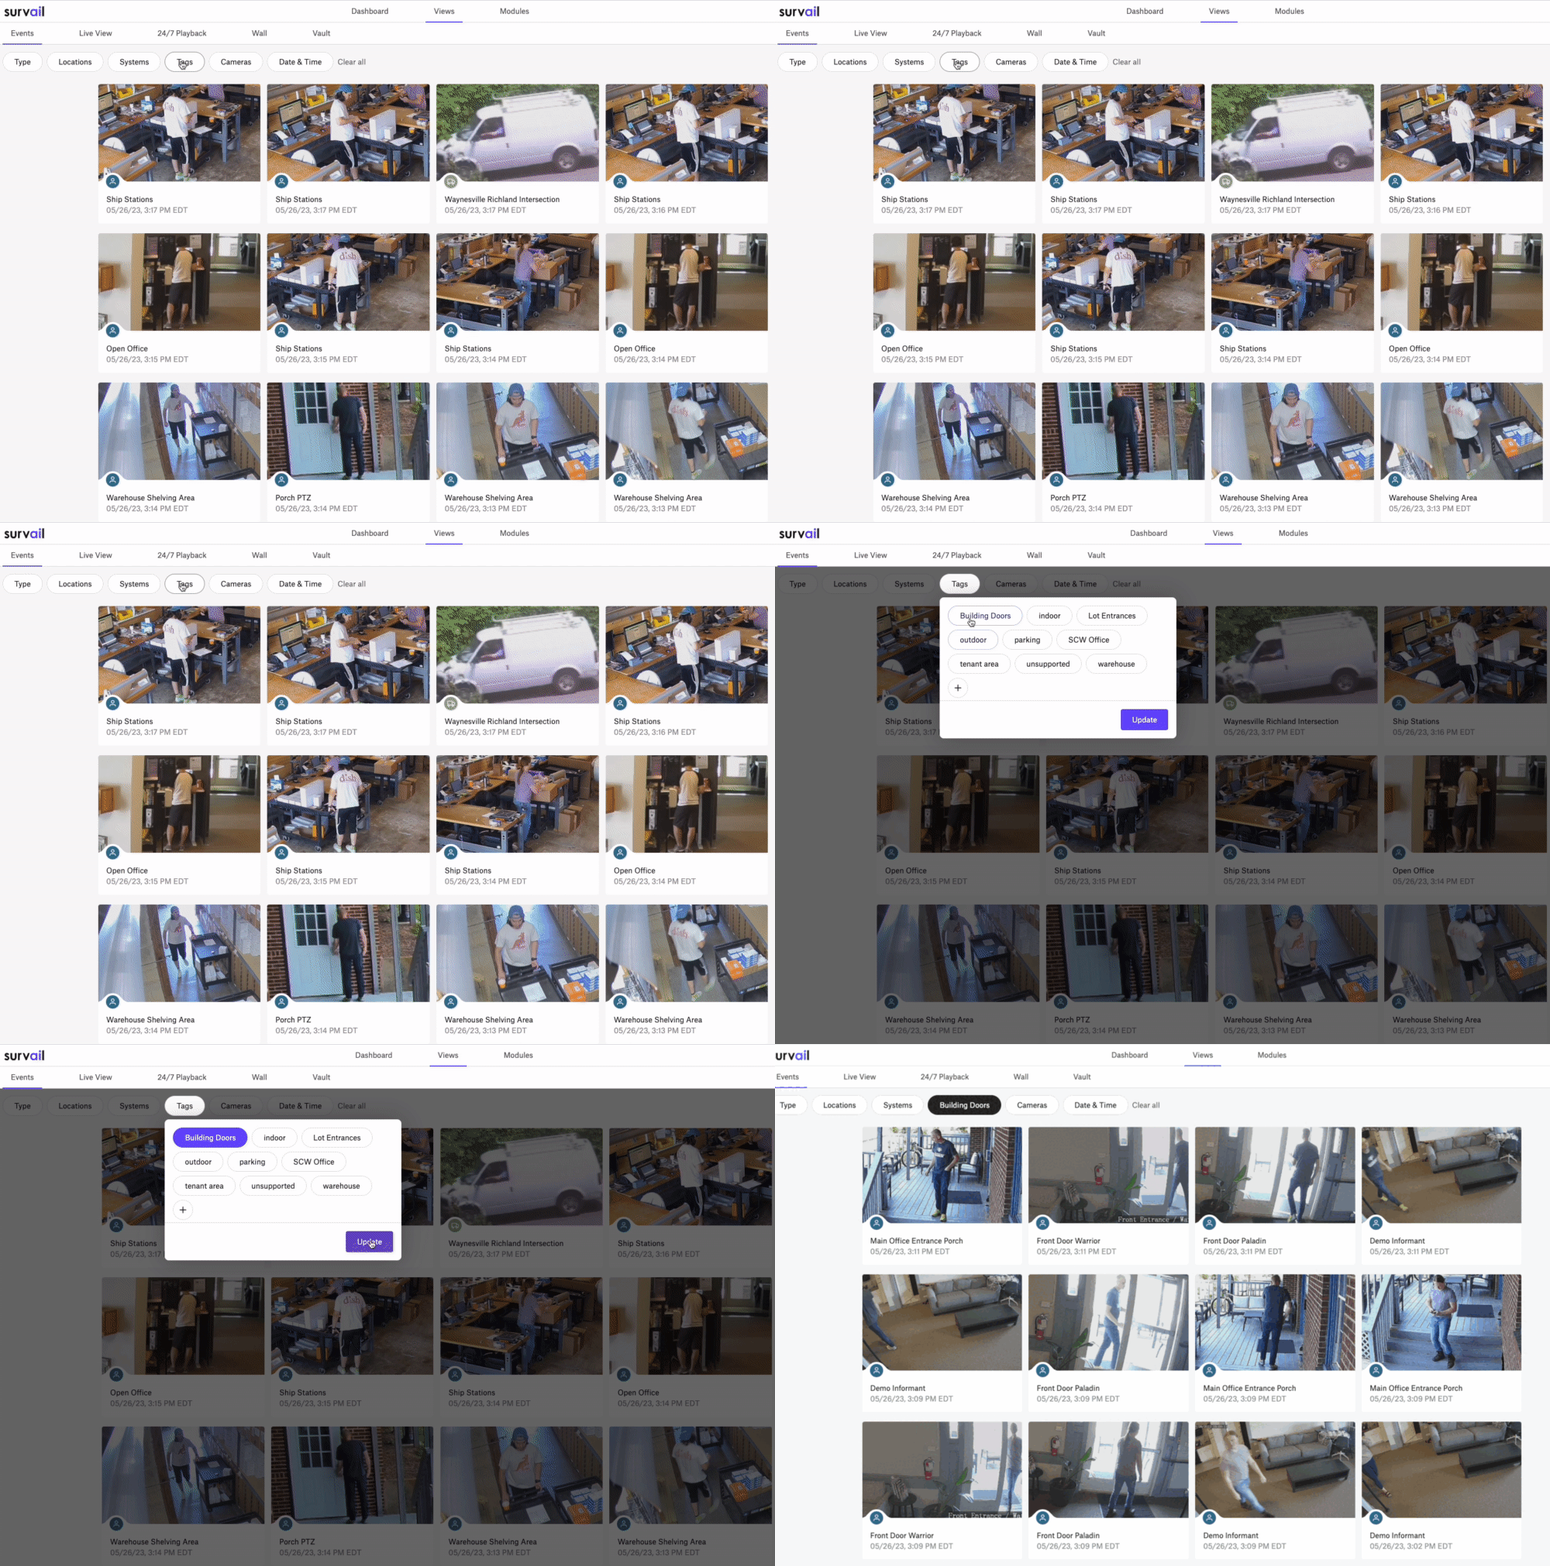
Find an Event via the Filters
You can filter events by what's in them, by location, by ICVR hardware, by camera tag groups, by individual camera(s), and/or by date / time. You can search by multiple criteria at once.
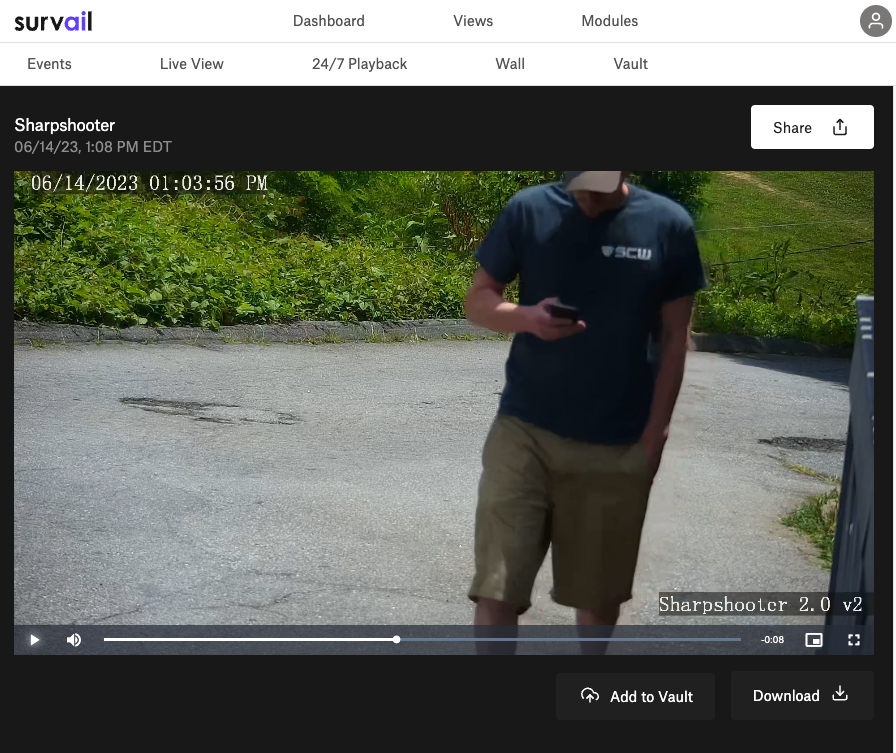
Click the Event Card to View Event
This brings you to the event viewer page.
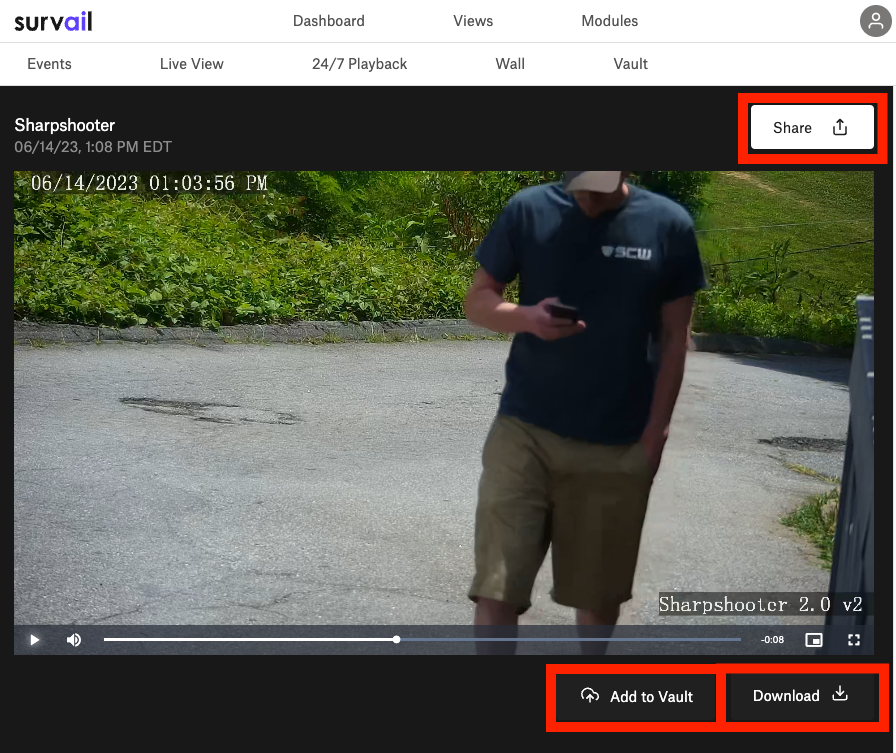
Click the "Add to Vault" button
The "Add to Vault" Button is located below the video player on the right side, but to the left of the "download" button.
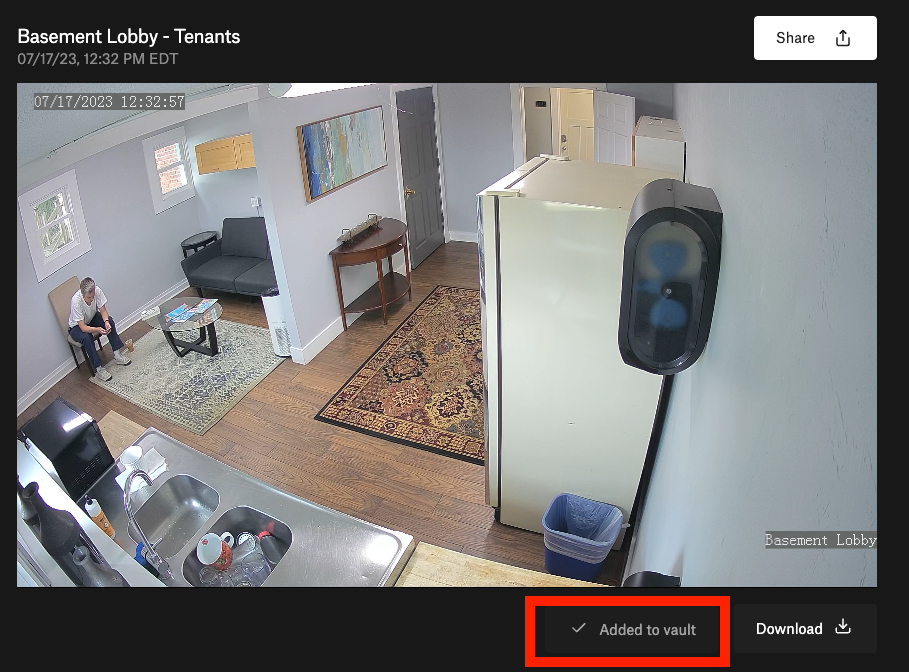
Video Added to Vault
The Button Text will change to state that the video has been added to vault.
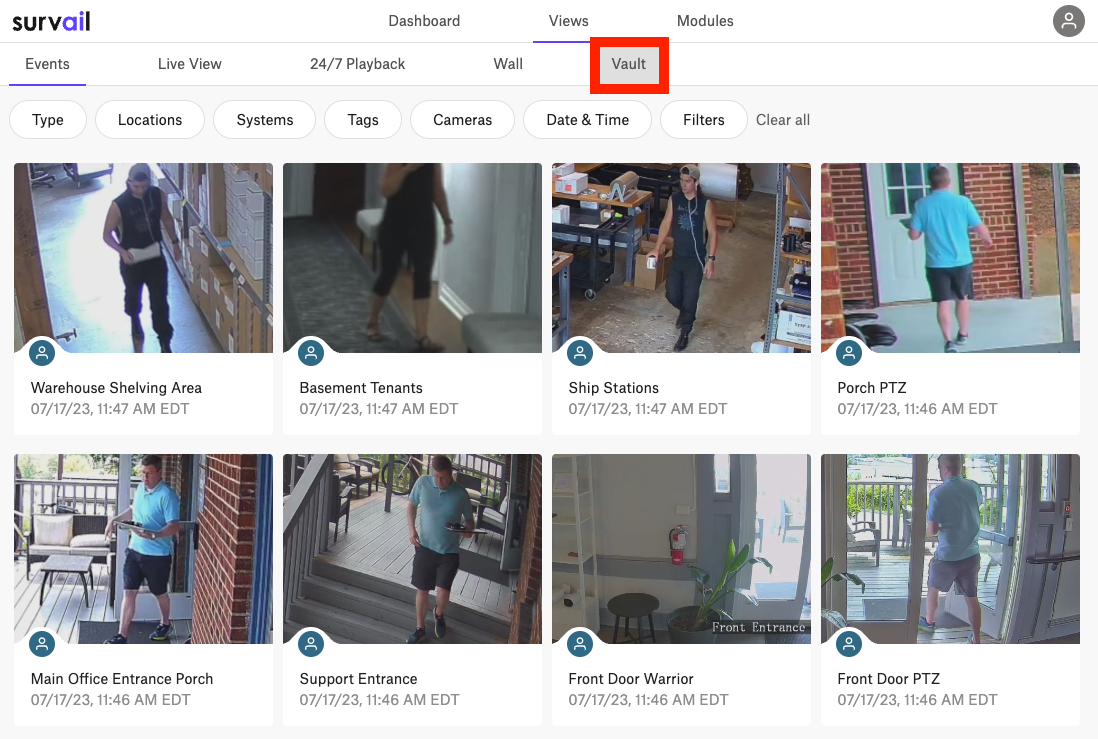
Click Vault
After adding a video to the vault, click "vault" in the Views Submenu. This will take you to your Video Vault.
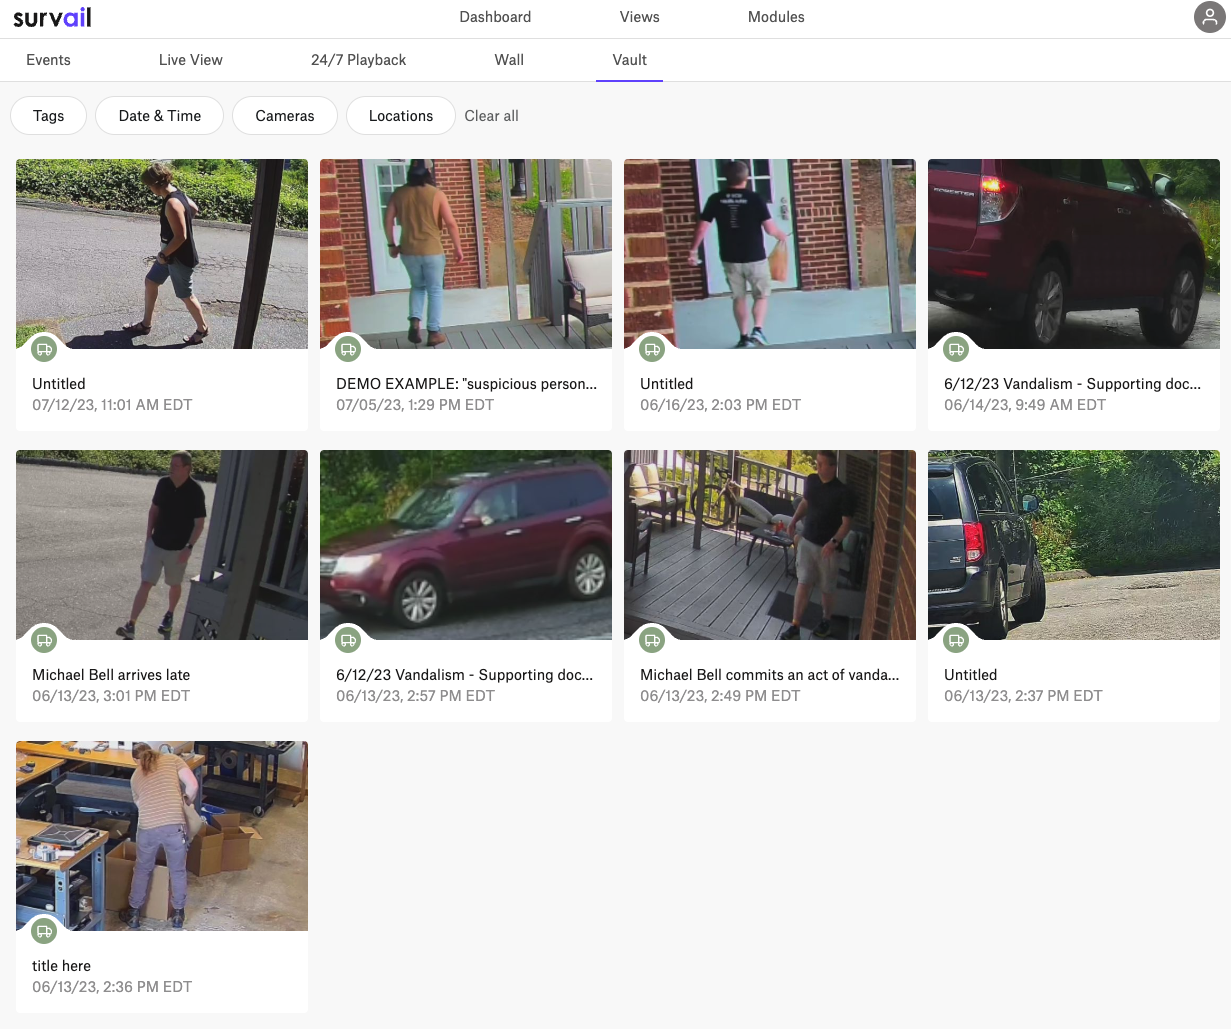
Click the Incident Card to View Vault Incident
This brings you to the vault incident viewer page.
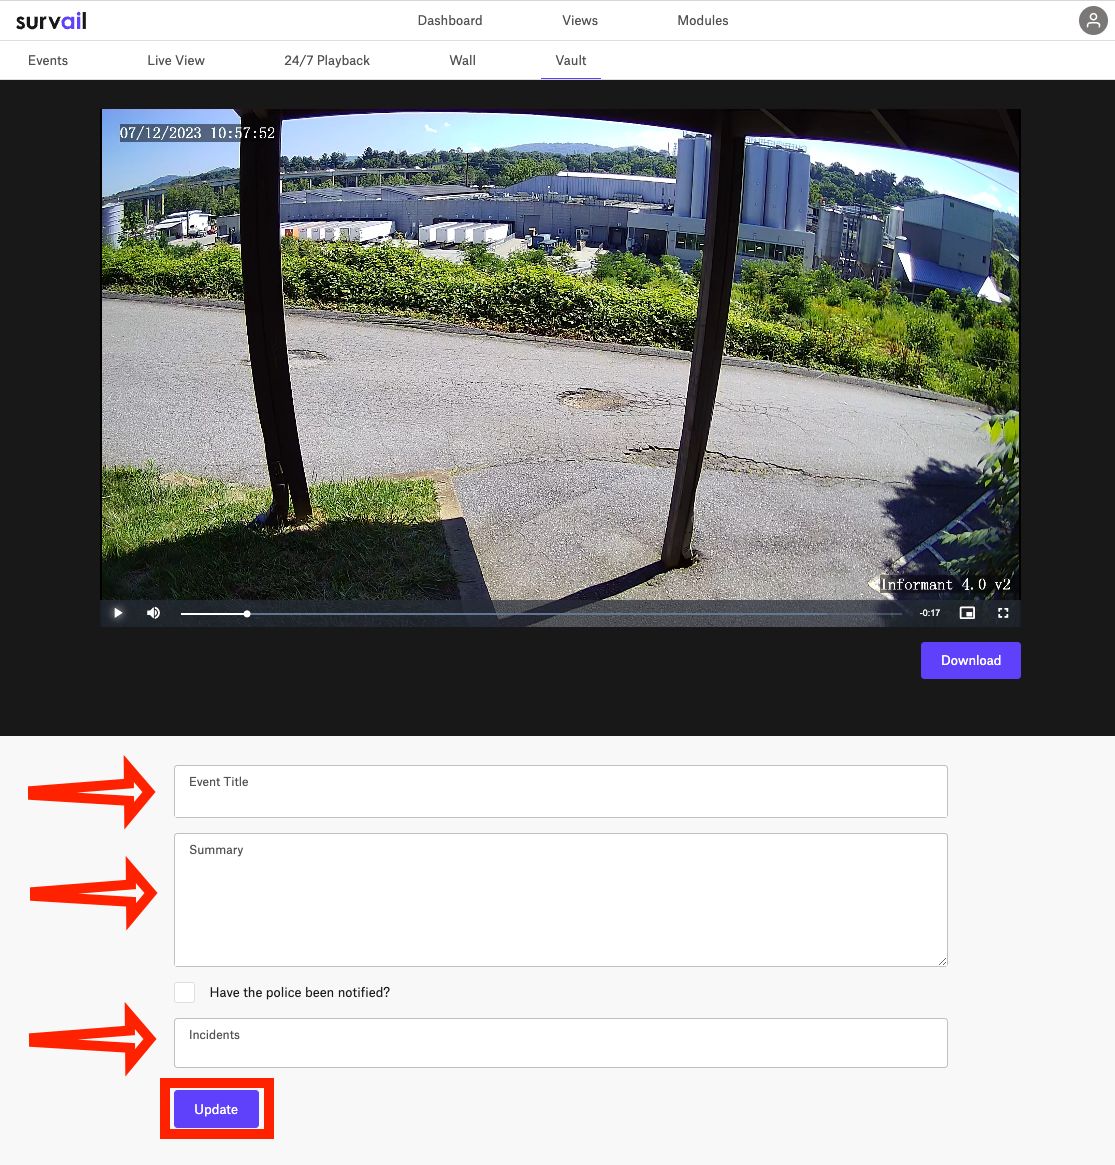
Create an Incident Report
When you store an event in vault and convert in into an incident, you have the option to title the event, give a summary, list whether the police have been notified and tag the event to a legal case file, HR file, or other potential filtering criteria.
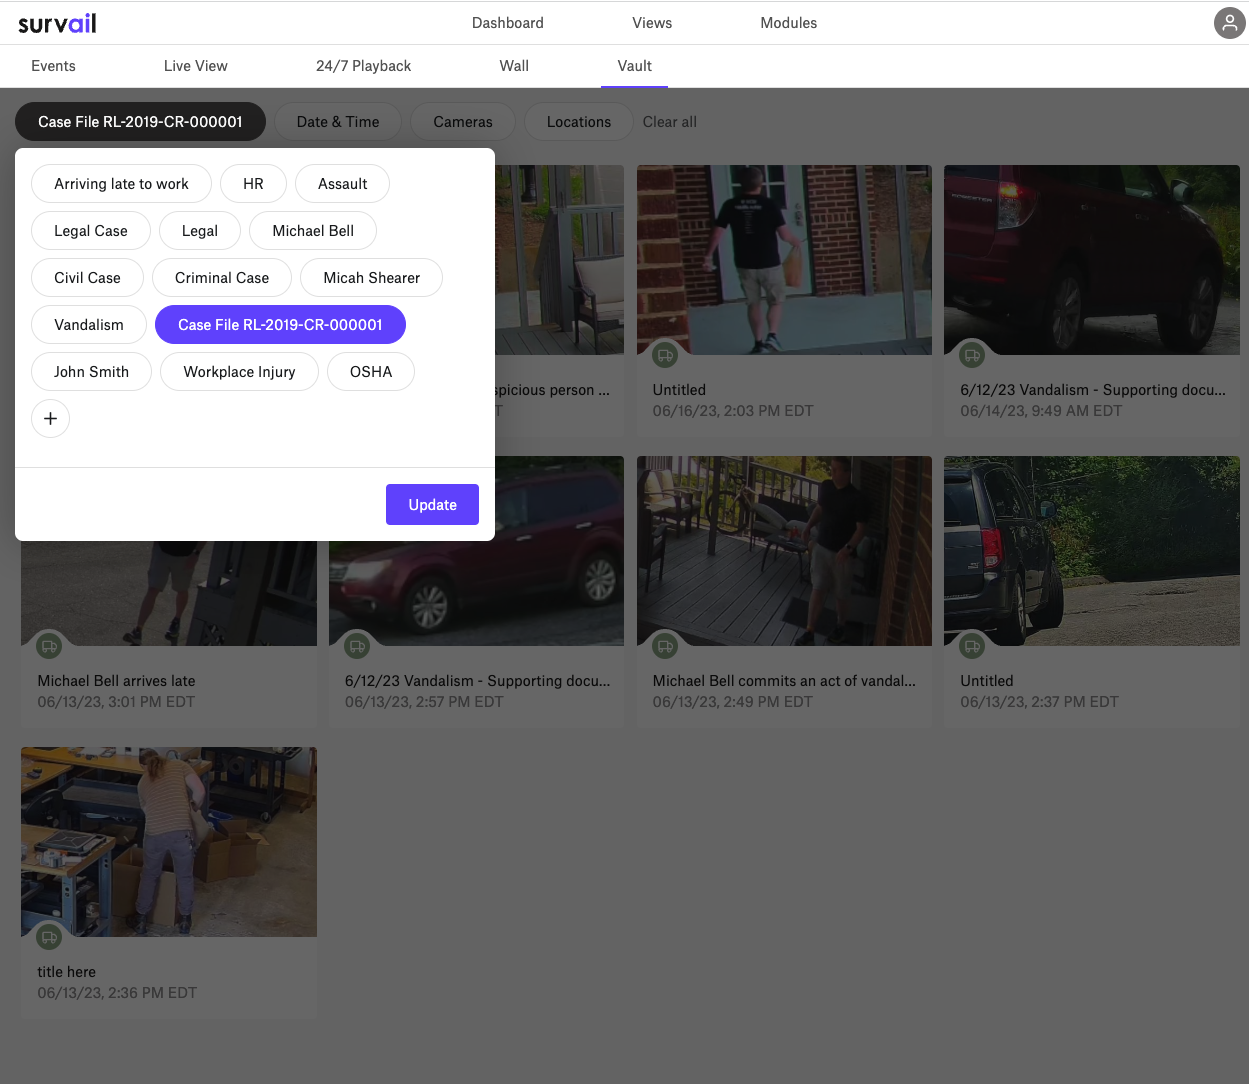
Vault Tags
The last item in the incident report allows you to tag incidents with search tags. You can use these tags in the main vault page to find all incidents that match certain criteria. We have a related guide on how to Manage Vault Tags for Easy Incident Sorting for Security, Management, HR, and Legal Teams.
Creating an Incident in Vault from Supplementary Documentation from the 24/7 Timeline
The First Responder Share function is an easy way to share events with first responders in an emergency, but only if cellular internet is available. If it is not, you may want to download the video and distribute it via thumb drives or other removable media. This process enables you to do this.

Log In To Survail
You can log into Survail at https://app.survail.com/.

Click on "Views" in the Top Menu
At the top of the screen, you can see the main Survail Menu. Click on the "Views" Tab. This will lead you to the Events page.
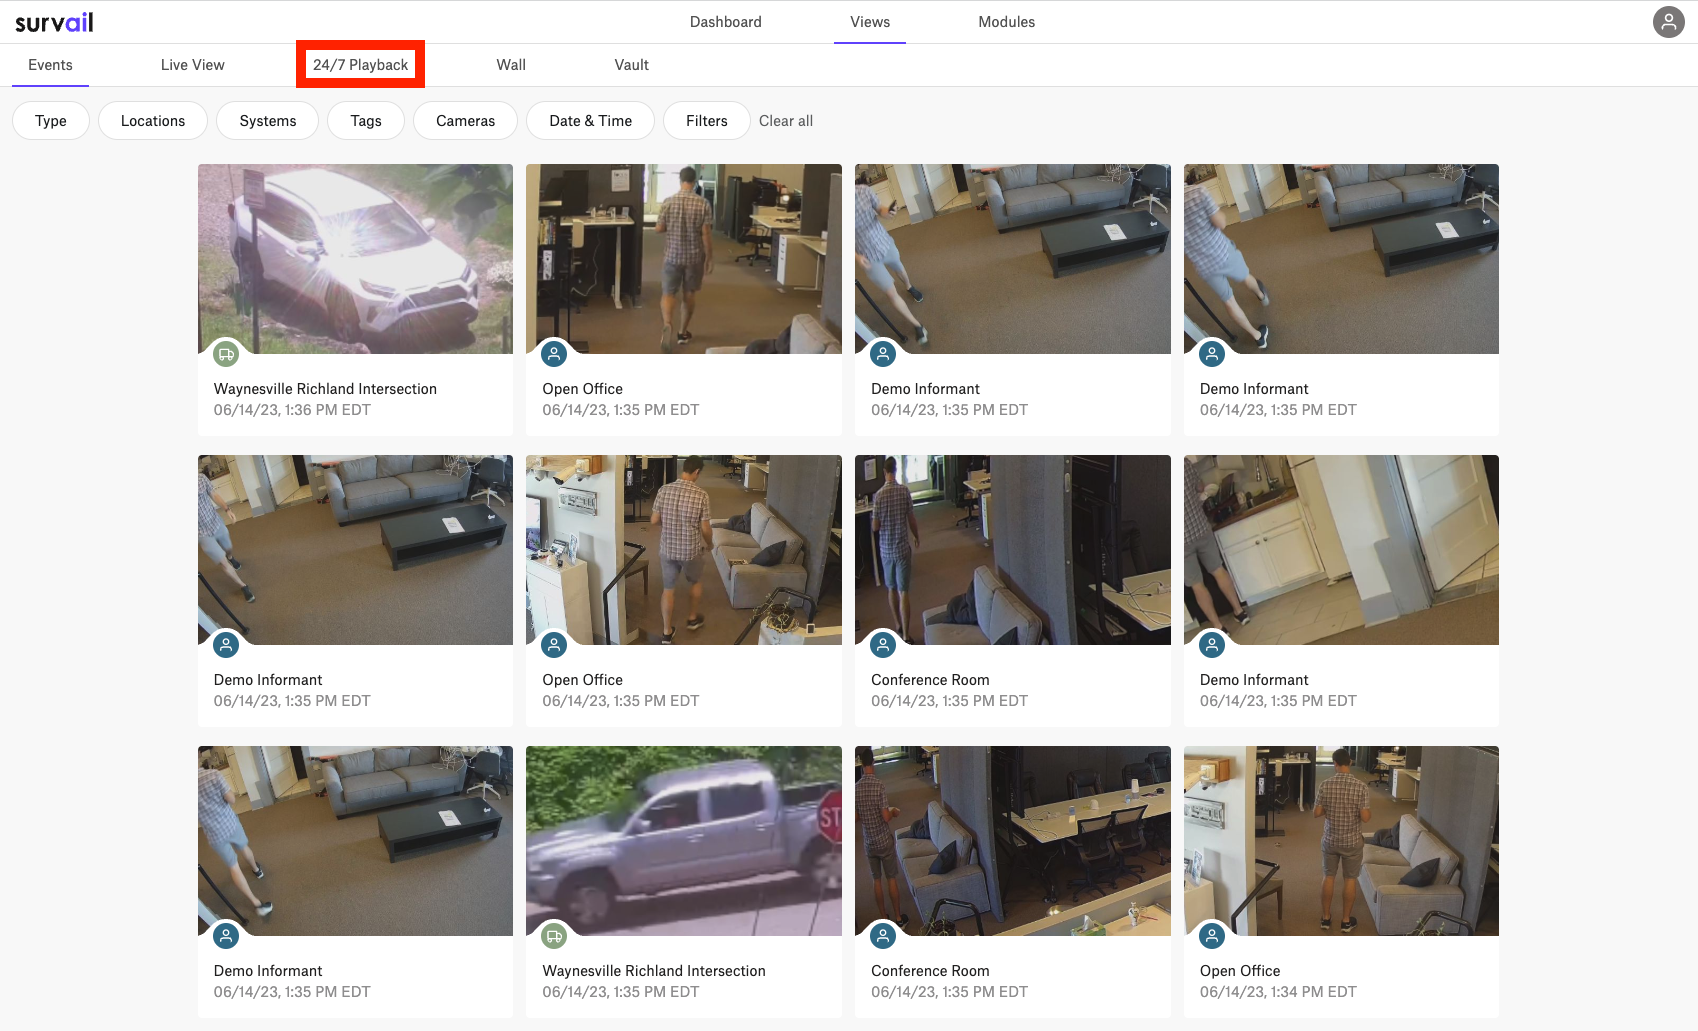
Click on "24/7 Playback"
You'll want to navigate to the "24/7 Playback" tab in the View Sub Menu.
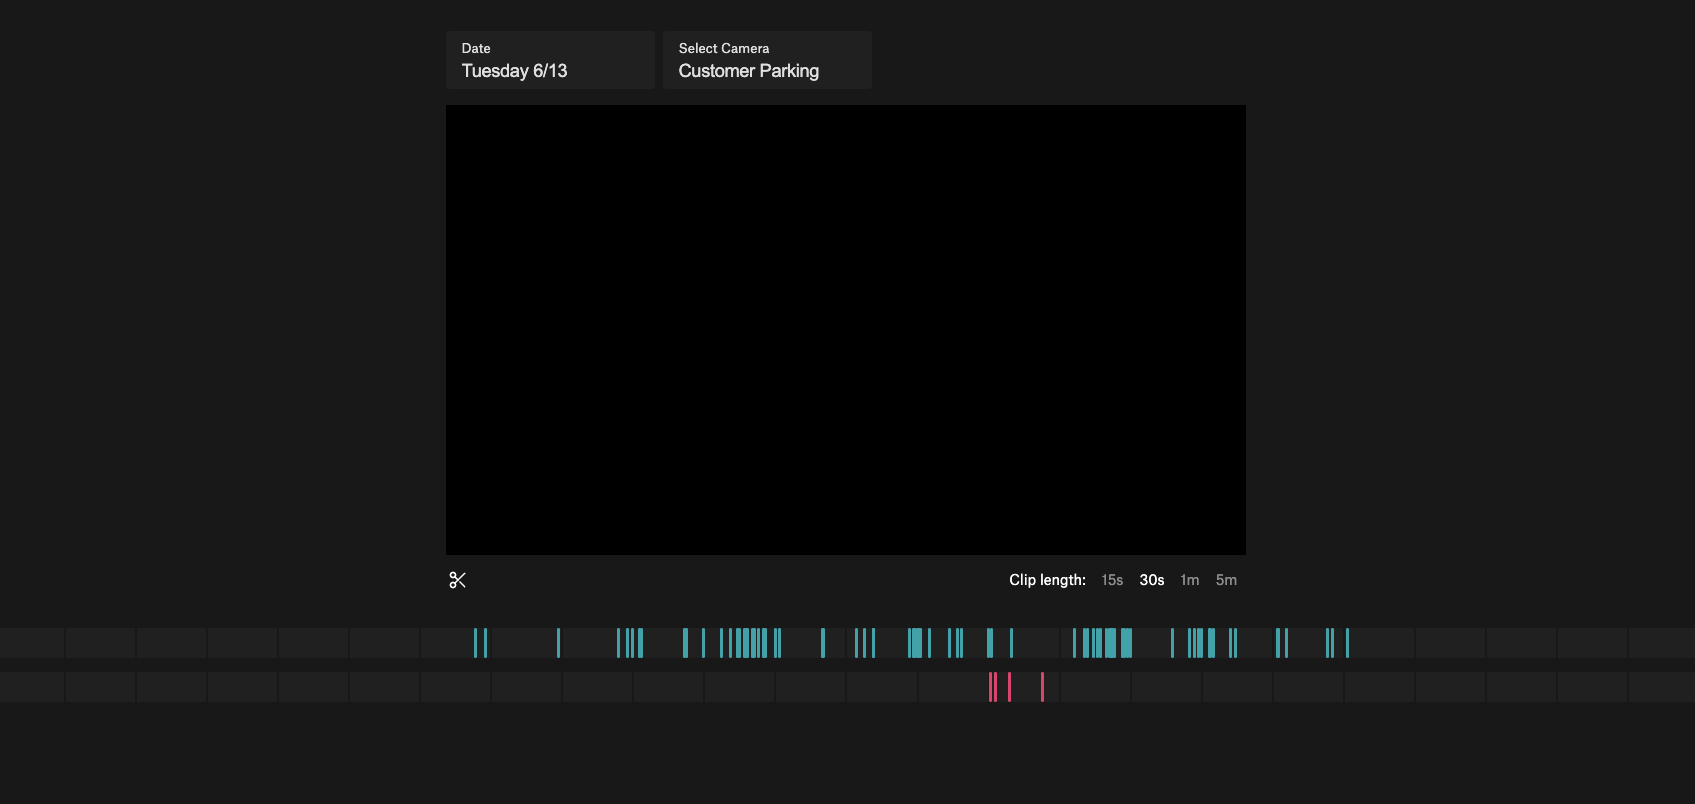
Arrive at the 24/7 Playback Page
You'll want to notice the date picker and camera picker at the top and the people / vehicle event snapshots at the bottom.
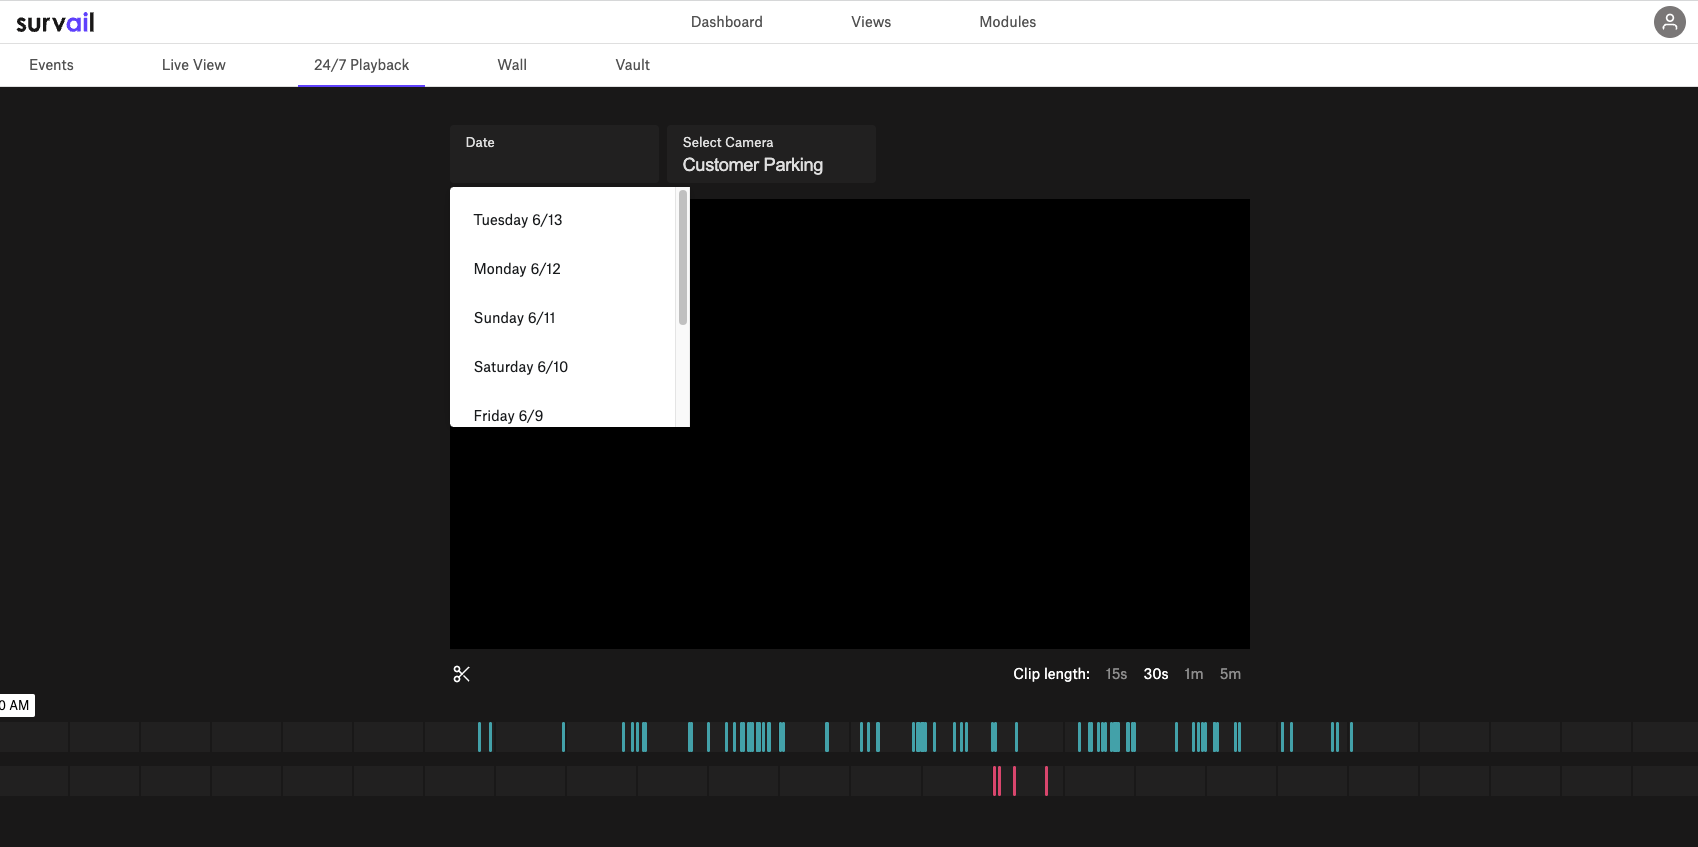
Choose the Date
On the top left, you can choose the date.
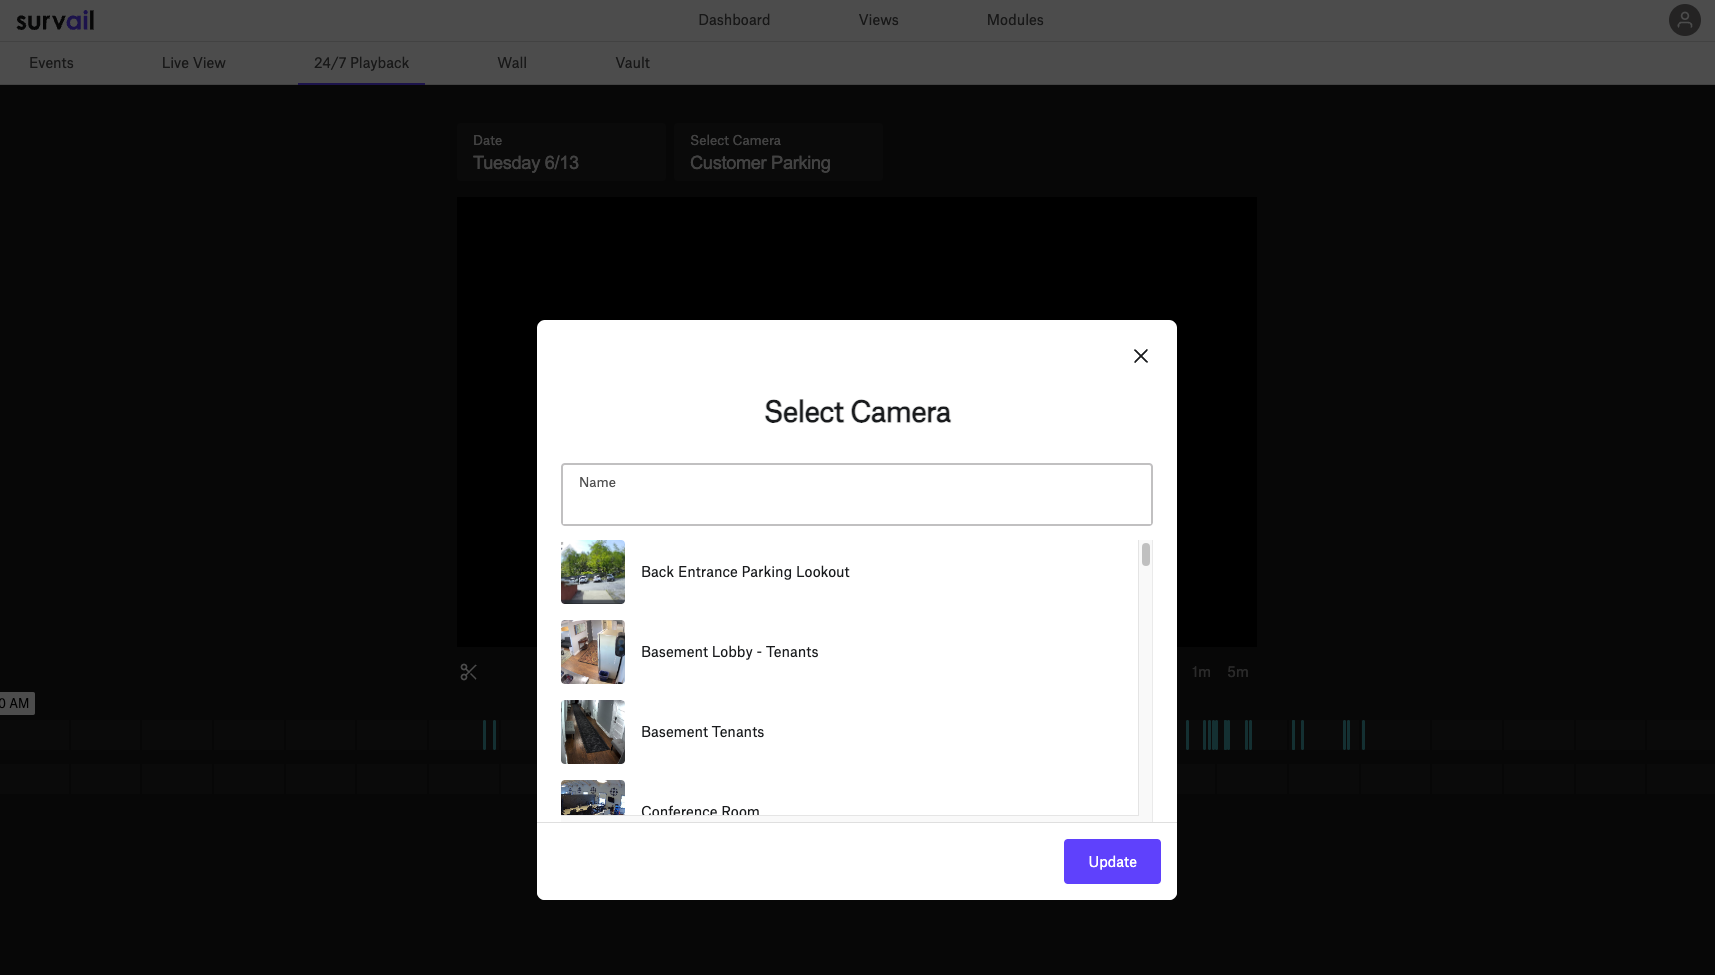
Select the Camera
Directly to the right of the date selector, you can view the camera selector, which will open the select camera modal.

Select the Camera
Directly to the right of the date selector, you can view the camera selector, which will open the select camera modal.
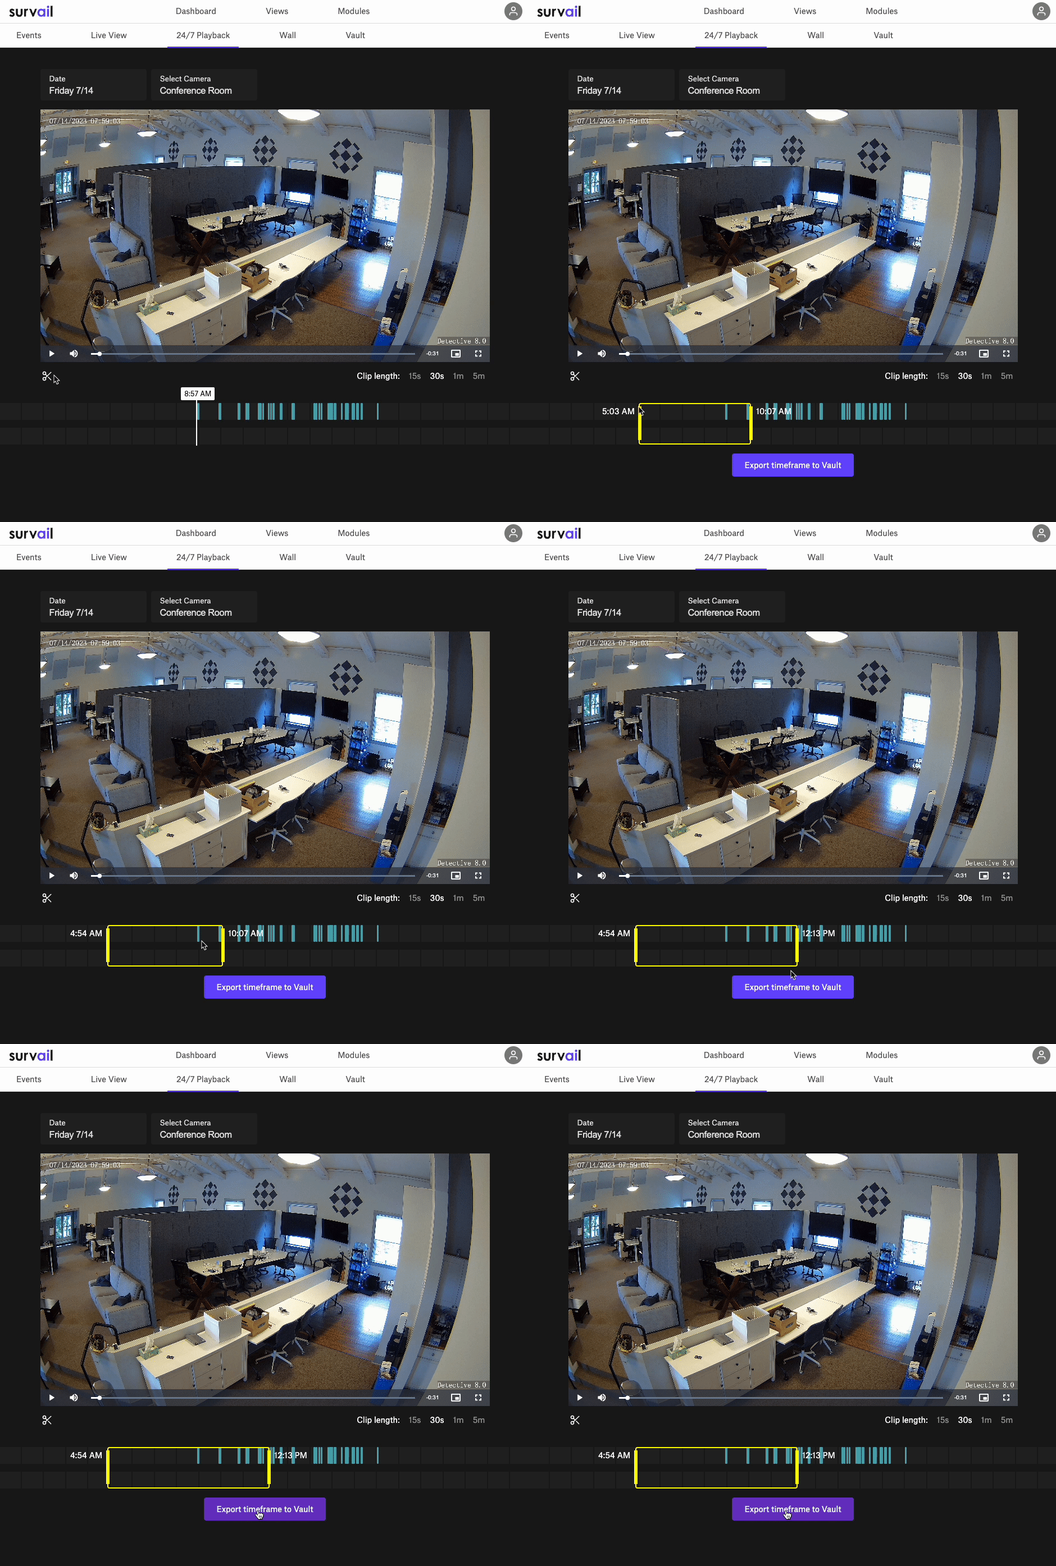
Export to Vault
Click the Scissors button to start the export to vault process. Then drag the start and end times for your clip to what you want. Lastly, press the "export timeline to vault" button directly below the timeline bar chart.
